
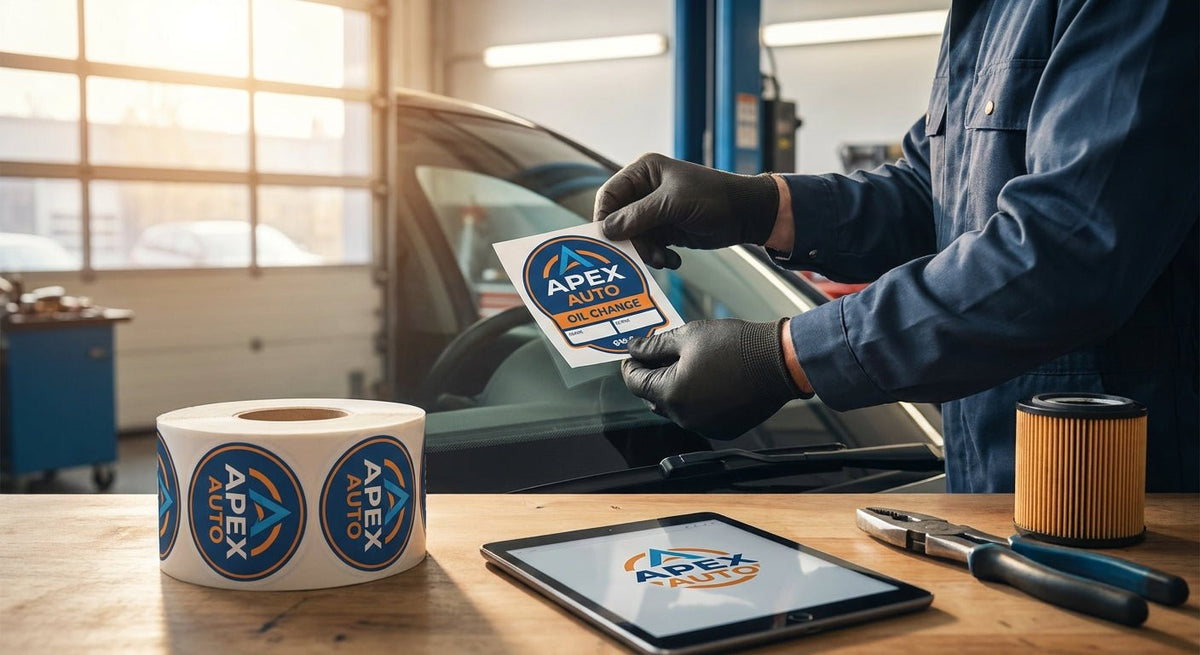
Branding oil change stickers with your shop logo is one of the lowest-cost, highest-visibility marketing moves an auto shop can make in 2026 — every windshield your team touches becomes a rolling advertisement. This guide covers exactly how to do it, from artwork prep to final placement, using McAuley Labels' oil change stickers with custom logo as the print-ready foundation.
TL;DR: To brand oil change stickers with a logo in 2026, you need a vector logo file (SVG or EPS at 300 DPI minimum), a thermal transfer printer capable of at least 300 DPI, and pre-formatted label stock sized for your windshield corner. McAuley Labels ships custom-logo oil change stickers direct to US shops, with your artwork printed on semi-gloss or static-cling stock. The full setup — artwork, printer, and stock — takes under 30 minutes to configure. Skip generic blank stickers; branded stickers increase call-back rates and reinforce your shop name at every service interval.
Why This Matters
A technician completes an average oil change in 15–30 minutes. The sticker placed on the windshield stays visible for the next 3,000–5,000 miles or 3–6 months. That sticker is the only branded touchpoint that travels with the customer after they leave your bay. Generic stickers with no logo waste that real estate. In a market where independent shops compete against chain quick-lubes on every corner, a logo-branded sticker signals professionalism and keeps your shop name in the driver's line of sight at every red light.
What You'll Need
- Your shop logo in vector format (SVG, EPS, or AI). PNG is acceptable if exported at 300 DPI or higher at print size.
- Logo dimensions: sized to fit within a 1.5" × 1.5" print zone on a standard windshield sticker (typically 2.5" × 1.75" overall).
- A thermal transfer printer — minimum 300 DPI resolution. 600 DPI recommended for logos with fine lines or small text.
- Branded label stock — either McAuley Labels' pre-printed custom-logo stickers (your logo baked in at manufacturing) or blank thermal stock for in-house printing.
- GoLabel or equivalent label design software if printing in-house.
- Ribbon (resin or wax-resin) matched to your label material.
- Time: 20–30 minutes for artwork submission or software setup; under 5 minutes per print run once configured.
Step 1: Prepare Your Logo File
Action: Export your logo at the correct resolution and color mode.
Your logo needs to print cleanly at roughly 1–1.5 inches wide. At that size, a raster image below 300 DPI produces visible pixelation on the sticker — your shop name looks unprofessional at arm's length. Export as SVG or EPS for vector clarity. If you only have a PNG, open it in any image editor and confirm the canvas is at least 450 × 450 pixels at 300 DPI before submission.
Color mode matters: thermal transfer printing is single-color (black ribbon on white or silver stock). Convert your logo to black-and-white before reviewing artwork. Gradients and drop shadows will flatten to a single tone — simplify them now. A clean, high-contrast logo with bold lines prints sharper at 300–600 DPI than one with subtle shading.
Common mistake: Submitting a logo exported from a website screenshot (72 DPI). The output looks blurry even on a 600 DPI printer because the source data isn't there. Always start from the original design file.
Expected outcome: A single logo file, black-and-white, vector or 300 DPI+ raster, ready to place on the sticker template.
Step 2: Choose Your Sticker Format
Action: Decide between pre-printed custom stock and in-house thermal printing.
Two production paths exist in 2026, and they serve different shop volumes:
- Pre-printed custom stock (McAuley Labels): Your logo is printed at the factory on every label in the roll. Your tech fills in the mileage and date fields at the counter or bay. This is the right call for shops doing 20+ oil changes per day who want zero printer setup at point of service. Minimum order quantities apply; McAuley ships direct to US shops.
- In-house thermal printing: You print the entire sticker — logo plus variable data — using a 300 or 600 DPI thermal transfer printer at the bay or service counter. More setup upfront, but you control every field and can change the date, mileage, technician name, and next-service interval on every single sticker without reordering stock.
For most independent shops, pre-printed stock is faster to deploy. For multi-location operations or shops that track technician-level data on each sticker, in-house printing gives more flexibility.
Expected outcome: A clear production decision that determines your next step — artwork submission to McAuley Labels or printer and software configuration.
Step 3: Submit Artwork or Configure Your Label Template
Action: Upload your logo to McAuley's order form, or build your template in GoLabel.
If ordering pre-printed stock: Visit the oil change stickers with custom logo product page. Upload your prepared logo file during checkout. Specify your sticker size — standard windshield corner stickers run 2.5" × 1.75". McAuley's team lays out the logo in the header zone and leaves the date, mileage, and next-service fields as fill-in areas. You receive a digital proof before production runs.
If printing in-house: Open GoLabel (the design software paired with GoDex thermal printers). Create a new label at your stock dimensions. Import your logo as a fixed object anchored in the upper zone of the template. Set variable fields — date, mileage, next service — as text objects the operator edits before each print. Save the template to the printer's internal memory if your printer supports it, so techs can print without a connected PC.
Common mistake: Placing the logo over the fill-in fields. Reserve the bottom 40% of the sticker for handwritten or printed service data. Logo goes top-center or top-left.
Expected outcome: A proof image (pre-printed path) or a saved GoLabel template (in-house path) ready for test printing.
Step 4: Verify Print Quality on a Test Label
Action: Run a test print and inspect at 12 inches — normal reading distance in a vehicle.
Print one sticker before committing to a full roll. Hold it at arm's length and check:
- Logo clarity: All lines crisp, no jagged edges. If lines look stepped or fuzzy, increase printer DPI (from 203 to 300, or 300 to 600) or simplify the logo artwork.
- Text legibility: Shop name and phone number readable without squinting. Minimum recommended font size is 8pt at 300 DPI; 6pt is viable at 600 DPI.
- Field alignment: Date and mileage boxes land where a pen or marker can fill them in without crowding the logo.
- Adhesive peel: Static cling stickers should release from the backing cleanly. Adhesive stickers should peel without stretching the label stock.
If you're using a GoDex RT863i at 600 DPI, fine-detail logos with line weights down to 0.5pt print without breaking up. At 203 DPI, stick to bold logos with line weights of 1pt or heavier.
Common mistake: Approving the test print under bright shop lighting. Check it in natural light or hold it against a windshield — glare can mask print defects you'll see when the sticker is on the vehicle.
Expected outcome: One confirmed test sticker that matches your quality standard before rolling through the full batch.
Step 5: Train the Counter Staff and Techs on Placement
Action: Standardize where and how the branded sticker goes on every windshield.
Branded stickers only work as marketing if they're visible and consistent. Set a shop-wide standard: upper-left corner of the windshield, inside surface, applied with the long edge horizontal. That position keeps the sticker in the driver's sightline and away from the primary wiper sweep path.
For static-cling stickers, the glass must be clean and dry — a 2-second wipe with a microfiber cloth before placement prevents air bubbles and early peeling. For adhesive stickers, press firmly from center outward. Either way, the branded sticker should be the last step in every service write-up, not an afterthought.
Common mistake: Letting techs choose their own placement location. Inconsistent placement — some upper-left, some center-top, some lower-right — reduces the visual impact and makes the shop look disorganized on social media posts customers take of their dash.
Expected outcome: Every vehicle leaving the bay carries the same logo-branded sticker in the same position, creating consistent visual branding across your customer fleet.
Step 6: Build a Reorder Schedule
Action: Set a reorder trigger based on daily volume, not when you run out.
Running out of branded stickers mid-week means falling back to blank or generic stock, which breaks the brand consistency you built. Calculate your weekly sticker consumption: daily oil changes × 5 working days. Order enough to keep 3 weeks of stock on hand. For a shop doing 30 oil changes per day, that's 450 stickers per week, or a standing order of 1,350 units as a safety buffer.
McAuley Labels ships direct to US shops, so lead times are predictable. Set a calendar reminder to reorder when the current roll hits the 25% mark — that's visible on the roll diameter and easy to eyeball.
Expected outcome: Zero gaps in branded sticker availability, regardless of volume spikes around oil-change promotion periods.
Troubleshooting
Logo prints blurry even at 300 DPI. The source file is almost certainly raster at low resolution. Re-export from the original vector design file at true 300 DPI. If you don't have the original vector, have the logo redrawn in Illustrator or Inkscape before resubmitting.
Sticker peels off the windshield within 2 weeks. Adhesive failure usually means the glass wasn't clean at application or the sticker was applied in cold weather below 40°F. Switch to a higher-tack adhesive stock, or train techs to wipe the glass with isopropyl alcohol before placing the sticker.
Shop name text too small to read from driver's seat. Increase font size to at least 10pt, or reduce the logo size to free up more space for the shop name text block. On a 2.5" × 1.75" sticker, the logo and shop name should each claim roughly 40% of the vertical space, with 20% reserved for fill-in fields.
Printer skips labels or misfeeds during a print run. Run the printer's auto-calibration routine. Label stock that has shifted on the roll causes the sensor to miss the gap between labels. Recalibrate after loading every new roll — this takes under 60 seconds on most GoDex models.
Colors look different from the digital proof. Thermal transfer is monochrome — black only. Any color in the submitted logo renders as black. If your logo relies on color to differentiate elements (e.g., a blue border from a red text), redesign for high-contrast black-and-white before ordering.
Static cling sticker falls off in summer heat. Static cling holds by electrostatic charge, which degrades on dirty glass and in extreme heat. Clean the windshield with glass cleaner, allow it to dry completely, then apply. For high-heat climates, switch to low-tack adhesive stickers on the inside surface.
Tools and Resources
- Oil change stickers with custom logo — pre-printed with your shop logo on semi-gloss or static-cling stock, shipped direct to US auto shops
- Oil change stickers for windshield with QR code and logo — same logo branding with a scannable QR code field for shops tracking service history digitally
- GoLabel label design software — free download from GoDex, compatible with all GoDex thermal printers; use it to build and save your in-house template
- A 300 or 600 DPI thermal transfer printer with resin or wax-resin ribbon matched to your label stock
- Isopropyl alcohol wipes for windshield prep at point of application
What to Do Next
Once your branded sticker system is running, the next move is adding a QR code to the sticker that links to your shop's online booking page or vehicle service history. That turns a passive reminder into an active customer retention tool. See the full guide on how to design custom oil change stickers with a logo for template layouts and QR integration options.
FAQ
How do I brand oil change stickers with my shop logo in 2026? Submit a 300 DPI+ vector logo to a custom label manufacturer like McAuley Labels and order pre-printed sticker rolls with your logo in the header zone. Alternatively, print in-house using a 300–600 DPI thermal transfer printer with a GoLabel template that includes your logo as a fixed graphic object.
What file format does my logo need to be for custom oil change stickers? SVG or EPS (vector) is preferred. PNG is acceptable at 300 DPI or higher at actual print size. JPEG and low-resolution PNGs produce blurry output and will fail the print quality check.
Can I print oil change stickers with a logo in-house, or do I have to order them pre-printed? Both options work. Pre-printed stock from McAuley Labels is faster to deploy and requires no printer investment. In-house printing with a 600 DPI thermal printer gives full variable-data control but requires setup time and consumable management (ribbon, label stock).
What resolution printer do I need to print a logo on oil change stickers? 300 DPI handles most logos cleanly. 600 DPI is the right call for logos with fine lines, small text, or detailed graphics. A 203 DPI printer works for plain text but degrades logo quality at small print sizes.
How many oil change stickers should I order at one time? Base the order on 3 weeks of consumption. A shop doing 30 oil changes per day uses roughly 450 stickers per week, so 1,350 units is a practical safety-buffer order quantity. Reorder when the roll hits 25% remaining.
What's the difference between static cling and adhesive oil change stickers for branding? Static cling stickers are applied to the inside of the windshield without adhesive, making them repositionable and residue-free. Adhesive stickers bond directly to the glass and hold better in extreme heat. Both are available with custom logo printing from McAuley Labels.
How long does it take to get custom logo oil change stickers from McAuley Labels? Lead times vary by order size and customization, but McAuley Labels ships direct from the US, which keeps domestic delivery times predictable. Check the product page for current production and shipping estimates when ordering.
Do branded oil change stickers actually increase customer retention? The sticker keeps your shop name and phone number visible at every service interval — 3,000 to 5,000 miles in most cases. Whether it directly drives call-backs depends on your market, but the cost per branded impression is near zero compared to any other advertising format available to an auto shop in 2026.
One Last Thing
The most overlooked detail in 2026: your shop's phone number on the sticker matters more than the logo in markets where customers don't search by name — they search by need. Make the phone number at least as prominent as the shop name. Drivers stuck in traffic looking at their windshield sticker should be able to read and remember your number without zooming in.