
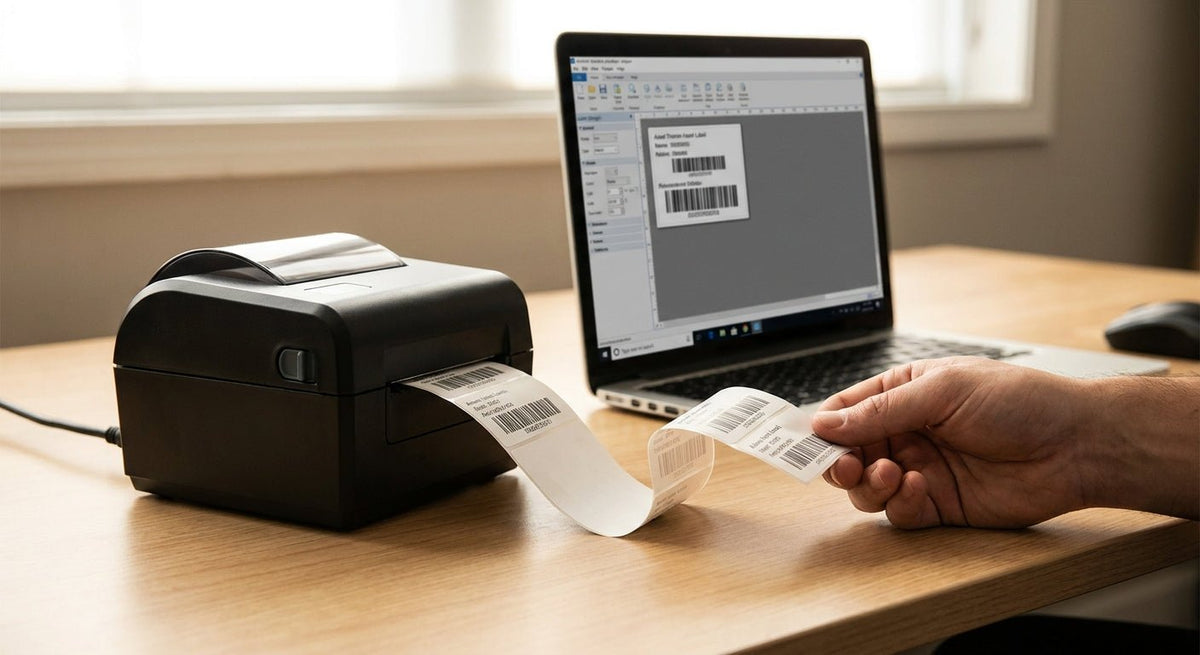
Printing asset tags with a thermal printer takes under 10 minutes once your hardware, label stock, and design file are aligned — this guide walks every step from setup to first print.
TL;DR: To print asset tags with a thermal printer in 2026, load the correct label stock (metallized polyester for metal surfaces, semi-gloss for general equipment), set DPI to match your label size (203 DPI for tags 2" or wider, 300 DPI for small text and barcodes), design your tag in GoLabel or ZPL-compatible software, calibrate the printer, and print a test batch. McAuley Labels manufactures dedicated asset tag printers and matching label stock that are pre-configured to work together — cutting setup time significantly.
Why this matters
Asset tags that smear, peel, or scan with errors cost more than the labels themselves. A barcode that reads wrong triggers an inventory discrepancy. A label that falls off a server rack means a missing asset on your next audit. Getting the thermal printing process right the first time — hardware, media, settings, and software in sync — is what separates a 30-minute setup from a 3-day troubleshooting session.
What you'll need
- A thermal label printer (thermal transfer recommended for asset tags; direct thermal for short-lifecycle indoor tags)
- The correct label stock: metallized silver polyester for equipment, heavy-duty options for outdoor/industrial, semi-gloss white for office environments
- Thermal transfer ribbon (wax-resin or resin grade for polyester stock) — not needed for direct thermal
- Label design software: GoLabel (free with Godex printers), Bartender, or NiceLabel
- USB or Ethernet cable for initial setup (Wi-Fi optional after)
- Approximately 20–30 minutes for first-time setup; under 5 minutes for subsequent print runs
The Steps
Step 1 — Choose the right label stock for your environment
Label media selection determines longevity. Metallized silver polyester tags survive moisture, cleaning chemicals, and abrasion that destroy paper labels within weeks. For metal surfaces like server racks, HVAC units, and manufacturing equipment, polyester is the only material that bonds reliably over 5+ years. Semi-gloss white works for office equipment in climate-controlled environments. Heavy-duty silver is the call for outdoor machinery, fleet vehicles, and warehouse equipment in 2026 where UV and temperature swings are factors.
The McAuley Labels asset tags for equipment metallized silver barcode label and the heavy-duty silver barcode options are pre-sized for standard asset tag formats (1" x 3", 2" x 1", and similar) and are rated for thermal transfer printing. Never load an inkjet-coated label into a thermal printer — the coating smears and can damage the printhead.
Common mistake: Buying generic "thermal labels" without confirming they are rated for thermal transfer if your printer uses ribbon. Direct thermal stock run through a thermal transfer printer produces faded, unreadable output.
Step 2 — Load the ribbon and label roll
For thermal transfer printing, ribbon goes in before labels. Match ribbon type to stock: wax ribbon for paper, wax-resin for coated paper or matte polyester, resin ribbon for metallized polyester and heavy-duty silver. Using a wax ribbon on polyester produces output that scratches off with a fingernail.
Load the ribbon so the ink-coated side faces the label stock. On most Godex printers, the ribbon feeds from the top spool and exits at the bottom. Seat the label roll so labels feed from the bottom of the roll with the print side facing up. Close the print head latch firmly — an unlatched head produces blank output and is the single most common cause of "printer not printing" calls.
Expected outcome: Ribbon sits taut across the platen with no wrinkles. Labels feed straight without skewing left or right.
Common mistake: Loading the ribbon with ink side facing away from the label. The printer runs, the labels come out blank, and the ribbon appears "used" but printed nothing.
Step 3 — Calibrate the printer to the label size
Calibration tells the printer where one label ends and the next begins. Without it, the printer cuts or pauses mid-label, wasting stock and producing misaligned tags. On Godex printers, hold the Feed button for 3 seconds after powering on — the printer feeds 2–3 labels and auto-detects the gap or black mark between labels.
For label stock with a black mark sensor (common on pre-printed asset tag rolls), switch the sensor setting in the printer menu from "Gap" to "Black Mark" before calibrating. Skipping this step causes the printer to feed continuously or stop after one tag.
Expected outcome: The printer advances to the start position of a fresh label and holds. A calibration test print shows the label boundary aligned within 1 mm of the label edge.
Common mistake: Calibrating with the wrong sensor mode selected. Always match the sensor setting to the actual label type before running calibration.
Step 4 — Set DPI, speed, and darkness in your software
Open GoLabel (or your preferred label software) and create a new label template matching your physical label dimensions exactly. Set DPI to match the printer's printhead: 203 DPI for tags 2" wide or larger with standard barcodes, 300 DPI for small text or dense QR codes, 600 DPI for fine print on sub-1" tags.
Print speed for asset tags should run at 3–4 inches per second (ips) — faster speeds on polyester stock can reduce barcode contrast. Set darkness (print density) to 10–12 on a 0–15 scale as a starting point; too high burns the ribbon and reduces barcode readability, too low produces faint output. In 2026, most Godex printers support these settings directly from the front-panel menu or via GoLabel's printer setup screen.
Common mistake: Leaving speed at the factory default of 6 ips for polyester tags. The result is a light, uneven print that fails scanner reads at distances over 12 inches.
Step 5 — Design the asset tag layout
A functional asset tag in 2026 includes: a sequential asset number (human-readable), a barcode or QR code encoding that number, and optionally a logo or department code. In GoLabel, use the "Serialization" function to auto-increment asset numbers across a print batch — no manual editing per tag.
Keep the barcode quiet zone (the blank margin on each side) at minimum 10x the narrowest bar width. Crowding text into the quiet zone is the top cause of scanner read failures. For QR codes, leave at least 4 modules of white space on all sides. Print a single test tag and scan it with a handheld barcode scanner before running a full batch.
Expected outcome: Scanner reads the barcode on the first attempt from 6–18 inches, with no orientation adjustment needed.
Step 6 — Run a calibration test print and verify scan quality
Print 5 test tags. Check: print is centered on the label with no cutoff on any edge; barcode lines are sharp with no ink bleed or gaps; text is fully legible at 8-point size; the ribbon did not wrinkle or crease mid-print. Scan each of the 5 tags with your barcode scanner. All 5 should read on the first pass.
If any tag fails a scan, adjust darkness up by 1 point and retest. If edges are cut off, recheck label dimensions in the software template — a 0.1" mismatch between template size and physical label size is enough to shift print off-center.
Expected outcome: 5 of 5 tags scan cleanly. You are ready for a full production run.
Common mistake: Skipping the test scan and printing 500 tags only to find a misconfigured barcode type (e.g., Code 128 vs. Code 39 mismatch with your asset tracking software).
Step 7 — Print, apply, and register tags in your asset tracking system
For batches over 100 tags, use a label rewinder to keep printed tags organized and avoid edge curls. Apply tags to a clean, dry surface — wipe equipment with isopropyl alcohol and let it dry for 30 seconds before applying metallized polyester tags; adhesion drops significantly on dusty or oily surfaces. Press firmly from center to edges for 10 seconds to activate the adhesive.
Scan each applied tag into your asset tracking system immediately. Do not apply tags in bulk and scan later — tags become separated from equipment records within minutes in a busy environment.
Troubleshooting
Tags print blank: Ribbon loaded with ink side facing away from labels, or print head latch is open. Recheck ribbon orientation and close the latch.
Printer feeds continuously without stopping: Sensor mode is set to Gap but labels have a black mark (or vice versa). Open the menu, switch sensor mode, and re-calibrate.
Barcodes fail scanner reads: Print density too low or speed too high. Reduce speed to 3 ips and increase darkness by 2 points. Re-test.
Print shifts off-center after 20–30 labels: Label dimensions in the software template do not match physical label size. Measure the label with calipers and update the template to within 0.5 mm accuracy.
Ribbon wrinkles mid-print: Ribbon and label stock width mismatch, or ribbon tension is too loose. Use ribbon that is the same width or slightly wider than the label stock. Adjust the ribbon tension knob clockwise by a quarter turn.
Label adhesive fails on metal surfaces: Wrong label stock for the surface type, or surface was not cleaned before application. Switch to metallized polyester with an aggressive adhesive and clean surfaces with isopropyl alcohol before applying.
Tools and resources
- Thermal transfer printer: A 300 DPI model handles both standard and high-density asset tag formats in 2026. The Godex RT230i (300 DPI) and GE330 are purpose-built for this use case and available from McAuley Labels.
- Label stock: Asset tags semi-gloss white barcode for indoor office equipment; metallized silver or heavy-duty silver for industrial and outdoor.
- Design software: GoLabel is free and pre-configured for Godex printers. Bartender and NiceLabel integrate with ERP and CMMS systems for batch printing.
- Barcode scanner: A USB handheld scanner for print verification before full production runs.
- Label rewinder: Required for production batches over 500 tags to prevent label curl and keep rolls organized.
What to do next
Once your asset tag printing workflow is running, the next step is building the broader tracking system — connecting printed tags to equipment records, setting up scan workflows, and choosing the right format (barcode vs. QR code) for your software. The guide on how to label equipment for asset tracking covers the system-level decisions that come after the printer is configured.
FAQ
What's the best printer for printing asset tags in 2026? A 300 DPI thermal transfer printer is the standard for asset tags in 2026. It prints sharp barcodes and small text on metallized polyester stock without ribbon smearing. Godex RT230i (300 DPI) and GE330 are the most commonly deployed models for this use case.
Can I use a direct thermal printer for asset tags? Yes, but only for short-lifecycle indoor tags. Direct thermal prints without ribbon, which lowers cost, but the output fades within 1–3 years when exposed to heat, light, or moisture. For durable asset tags on equipment, thermal transfer is the correct method.
What label material should I use for metal equipment? Metallized silver polyester with an aggressive adhesive. It resists moisture, chemicals, and abrasion, and bonds reliably to painted and bare metal surfaces. Standard paper labels delaminate from metal within weeks in industrial environments.
Is 203 DPI or 300 DPI better for asset tags? 300 DPI is better when tags are small (under 2" wide) or include dense QR codes. For larger tags with standard Code 128 or Code 39 barcodes, 203 DPI is sufficient. See the McAuley Labels guide on 300 DPI vs 600 DPI resolution for a full breakdown.
How many asset tags can a thermal printer produce per hour? At 4 ips print speed, a desktop thermal transfer printer produces approximately 1,200–1,800 tags per hour for a 2" x 1" label size. Industrial models running at 8 ips exceed 3,000 tags per hour.
Why are my printed barcodes not scanning? The four most common causes: print density too low, print speed too high, incorrect barcode quiet zone, or a barcode type mismatch with your scanner or software. Start by reducing speed to 3 ips and increasing darkness by 2 points, then retest.
Do I need special software to print asset tags from a thermal printer? You need label design software that supports serialization (auto-incrementing numbers). GoLabel is free with Godex printers and handles serialized asset tag batches. Bartender and NiceLabel offer deeper ERP integration but carry a licensing cost.
How long do thermal transfer asset tags last? On metallized polyester stock with a resin ribbon, thermal transfer prints last 5–10 years indoors and 3–5 years outdoors under normal UV and moisture exposure. Direct thermal prints on paper stock last 1–3 years under ideal indoor conditions.
One last thing
The most expensive mistake in an asset tagging rollout is not the printer — it is using the wrong ribbon grade. A wax ribbon on a polyester label produces output that looks perfect off the printer and fails completely within 60 days under normal handling. Resin-grade ribbon on polyester stock costs roughly 15–20% more but delivers output that survives solvents, heat, and abrasion. For any asset tag that needs to last past the next annual audit, resin ribbon is not optional.