
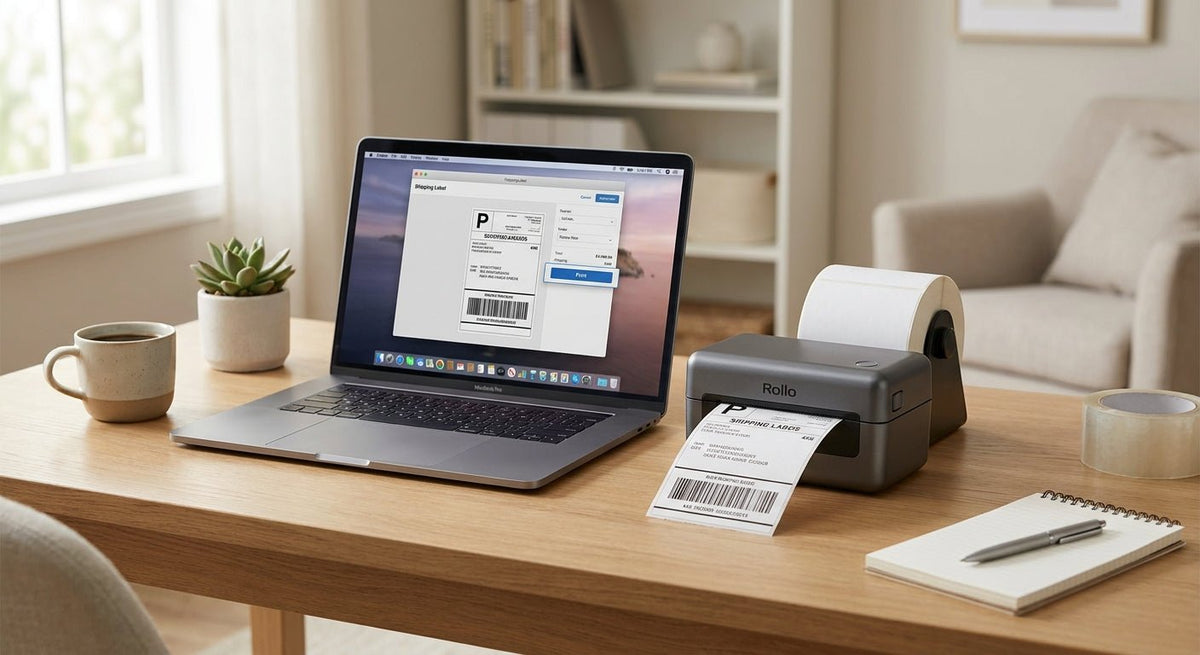
Printing shipping labels from a MacBook is straightforward once your printer driver is installed and your carrier account is set up — but the wrong settings waste labels and slow down your fulfillment. This guide covers every step from driver install to your first clean print in 2026.
TL;DR: To print shipping labels from a MacBook in 2026, install your thermal printer's macOS driver, connect via USB or network, set the page size to 4×6 inches in System Settings, generate your label through your carrier's web portal or shipping software, and print directly — no scaling. A dedicated 4×6 thermal label printer prints each label in under 3 seconds with no ink cost.
Why this matters
MacOS handles printer configuration differently than Windows. Apple's AirPrint defaults and the built-in PDF renderer both add page margins and scaling that destroy barcode readability on a 4×6 label. Carriers including UPS, USPS, FedEx, and DHL all require barcodes to scan at the door — a misaligned or scaled label gets rejected, the package gets returned, and you eat the reprint cost. Getting the setup right once eliminates that entirely.
What you'll need
- A MacBook running macOS Ventura, Sonoma, or later (2026 current)
- A direct thermal label printer with a macOS-compatible driver (USB or Ethernet)
- 4×6 inch direct thermal label stock loaded in the printer
- A carrier account: UPS, USPS, FedEx, DHL, or a multi-carrier platform like ShipStation or Pirateship
- Your package weight (a postal scale accurate to 0.1 oz)
- The shipment's destination address
Step 1: Install the correct macOS driver
Action: Download and install the printer driver built for macOS — not the Windows version.
Most thermal label printers ship with a driver CD that is useless on a MacBook. Go directly to the manufacturer's website, find the macOS driver for your exact model, and run the .pkg installer. After installation, restart your MacBook. If your printer uses a generic CUPS driver (common on Linux-compatible models), macOS may detect it automatically over USB — but you still need to confirm the driver is active in System Settings → Printers & Scanners before proceeding.
Common mistake: Installing a Windows-only driver, then wondering why the printer appears as "offline" in macOS. Always verify the driver file ends in .pkg or .dmg, not .exe.
Expected outcome: The printer appears in System Settings → Printers & Scanners with a status of "Idle" or "Ready".
Step 2: Add the printer and create a 4×6 custom paper size
Action: Add the printer to macOS and define a custom 4×6 paper size that matches your label stock exactly.
In System Settings → Printers & Scanners, click the + button and select your printer from the list. Once added, open any print dialog (Command-P), click Paper Size → Manage Custom Sizes, and create a new size: Width 4.00 in, Height 6.00 in, all margins 0.00 in. Name it "4x6 Label" and save. This custom size must be selected every time you print a label — macOS does not remember it per-printer by default.
Why it matters: Without a zero-margin 4×6 paper size, macOS scales the label to fit its assumed printable area, shrinking barcodes by 10–15%. A barcode shrunk 10% often falls below the minimum bar-width spec for UPS and USPS scanners.
Common mistake: Using the default "US Letter" size and clicking "Scale to Fit". This always produces an undersized, misregistered label.
Expected outcome: A custom "4x6 Label" paper size saved and available in every print dialog.
Step 3: Generate your shipping label through your carrier portal
Action: Log into your carrier's web portal or shipping software and generate a label in PDF or ZPL format.
For USPS, go to Click-N-Ship at usps.com. For UPS, use the UPS Shipping portal. For FedEx, use Ship at fedex.com. For multi-carrier volume shipping, platforms like Pirateship (free), ShipStation, or Shippo consolidate all carriers in one dashboard and typically offer discounted commercial rates — Pirateship's USPS Priority Mail discounts run up to 89% off retail in 2026. Enter the destination address, package weight, and service level. Download the label as a PDF (not a ZPL or EPL file unless your printer's driver handles raw label languages).
Why it matters: The PDF format is universally compatible with macOS's print system. ZPL files require direct-to-printer raw printing and a separate workflow.
Common mistake: Downloading a 4-up or 8.5×11 formatted label PDF. Always confirm your carrier portal is set to output a single 4×6 label per page before downloading.
Expected outcome: A single-page PDF with one 4×6 label ready to print.
Step 4: Print with the correct settings in Preview or Chrome
Action: Open the PDF in Preview (not Chrome or Safari) and print with scaling disabled.
Open the downloaded label PDF in Preview. Press Command-P. In the print dialog:
- Printer: select your thermal label printer
- Paper Size: select your saved "4x6 Label" custom size
- Scale: set to 100% — never "Fit to Page"
- Orientation: confirm it matches the label layout (usually portrait)
Click Print. The job sends in under 5 seconds on a USB-connected thermal printer. The label exits fully dry and ready to apply — direct thermal ink dries instantly because there is no ink: the heat element activates the label coating directly.
Why it matters: Chrome's built-in PDF viewer adds its own margin handling that can clip label edges. Preview respects the page size exactly.
Common mistake: Printing from a browser PDF viewer with "Fit" scaling active. Check the scale field every single time — macOS sometimes resets it between sessions.
Expected outcome: A clean, full-size 4×6 label with all barcodes and text within the printable area.
Step 5: Verify the label before applying
Action: Scan the barcode with your phone's camera or a barcode scanner app before sticking the label to the package.
All major carriers provide a barcode that encodes the tracking number and routing data. If the barcode does not scan, the package cannot be tracked and may be missorted. Hold your phone camera 6–8 inches from the barcode — if it resolves the tracking number within 2 seconds, the print quality is acceptable. If it takes more than 4 seconds or fails entirely, check print density settings in your driver (increase darkness by 1–2 steps) and reprint.
Why it matters: A label that looks correct to the eye can still have bar widths too narrow for automated sorters running at 500–600 packages per minute at carrier hubs.
Common mistake: Skipping the scan check and applying the label directly. One failed scan equals one returned shipment.
Expected outcome: Phone camera resolves the tracking number in under 2 seconds.
Step 6: Set your printer as the default and save the workflow
Action: Set your thermal printer as the macOS default printer and bookmark your carrier portal.
In System Settings → Printers & Scanners, select your thermal printer and set it as the default. Save your carrier portal login and label-download workflow as a browser bookmark or shortcut. If you ship daily, a multi-carrier platform like Pirateship or ShipStation reduces label generation to under 60 seconds per order by storing your package presets and addresses. McAuley Labels' 4×6 thermal label printer is plug-and-play on macOS with a USB connection and handles continuous label rolls up to 300 labels — sized for a full day of small-business shipping without reloading.
Why it matters: Resetting printer defaults and paper sizes every session adds 3–5 minutes per batch and introduces the scaling error risk each time.
Expected outcome: Default printer set, 4×6 paper size pre-saved, and portal bookmarked for a repeatable sub-60-second label workflow.
Troubleshooting
Label prints with white margins on all sides The paper size is not set to 4×6 with zero margins. Go back to Manage Custom Sizes and confirm all four margin fields are 0.00 in.
Printer shows as offline in macOS Unplug the USB cable, wait 10 seconds, reconnect. If still offline, delete the printer from System Settings and re-add it. On some macOS versions, a printer can get stuck in an error queue — open Printer Queue and cancel any pending jobs first.
Barcode prints but won't scan Darkness/density is too low. Open Printer Preferences from the print dialog, find the density or darkness slider, and increase it by 2 steps. Reprint a test label and re-scan.
Label prints at half size Scale is set to something other than 100%. macOS sometimes defaults to "Fit to Paper" after a software update. Check the scale field in every print session.
PDF opens but prints blank Some carrier PDFs use transparent layers that confuse older CUPS drivers. Open the PDF in Preview, go to File → Export as PDF, save a new copy, and print from the new file.
Printer driver disappeared after a macOS update Apple's major OS updates (Ventura → Sonoma, for example) occasionally reset third-party printer drivers. Re-download the .pkg driver from the manufacturer's site and reinstall.
Tools and resources
- Direct thermal label printer: A dedicated 4×6 printer handles 203 DPI at minimum; 300 DPI prints sharper barcodes and cleaner address text. McAuley Labels' 4×6 thermal label printer runs on macOS without extra middleware.
- Pirateship — free multi-carrier platform with USPS, UPS, and DHL. No monthly fee.
- ShipStation — paid platform starting at $9.99/month in 2026; integrates with Shopify, Etsy, Amazon, and WooCommerce.
- Preview (macOS built-in) — the only PDF viewer that consistently respects zero-margin 4×6 page sizes on Mac.
- Postal scale — any scale accurate to 0.1 oz works; USPS charges by the ounce on First Class packages.
- For more on how thermal label printers fit into a shipping and warehousing setup, see thermal label printer for shipping and warehousing.
What to do next
Once your Mac-to-printer workflow is dialed in, the next question is label stock: direct thermal labels degrade in heat and UV, so packages sitting on a porch in summer can fade within 48 hours. For high-volume or outdoor-exposed shipments, thermal transfer with a ribbon produces a label that survives 6+ months of exposure. Read the full breakdown at direct thermal vs thermal transfer — which should you use.
FAQ
How do I print shipping labels from a MacBook without a special printer? You can print on a standard inkjet or laser printer using full-sheet label paper or plain paper with tape, but inkjet labels smear when wet and laser labels can peel in heat. A direct thermal printer is the only setup that produces a durable, scan-reliable label reliably every time.
What is the correct paper size for shipping labels on a Mac? Set a custom paper size of exactly 4.00 × 6.00 inches with all margins at 0.00 inches. Name it "4x6 Label" in macOS's Manage Custom Sizes dialog so you can select it from any print dialog in 2026.
Why does my shipping label print too small on a Mac? The scale is not set to 100%, or the paper size is set to US Letter instead of 4×6. Open the print dialog, confirm paper size is "4x6 Label", and confirm scale is exactly 100%.
Can I use AirPrint to print shipping labels on a Mac? AirPrint works for general documents but is unreliable for 4×6 label printing because it does not preserve zero-margin custom page sizes consistently. Connect your thermal printer via USB and use the manufacturer's driver instead.
Do I need special software to print labels from a Mac? No special software is required beyond the printer driver and a PDF viewer. Preview handles label PDFs correctly. Multi-carrier platforms like Pirateship or ShipStation are optional but save significant time at volume.
Is a thermal printer necessary to print shipping labels from a MacBook? Not strictly, but it is the standard in 2026 for any business shipping more than 5 packages per week. Direct thermal printers cost nothing per label after the hardware purchase — no ink, no toner. An inkjet setup costs roughly $0.05–$0.12 per label in ink alone.
How do I fix a shipping label that won't scan after printing from a Mac? Increase the print darkness setting in your printer driver by 2 steps, confirm the scale is 100%, and reprint. If the problem persists, the label stock may be expired or stored in a humid environment — replace the roll.
What carrier portals work best for generating labels on a Mac in 2026? USPS Click-N-Ship, UPS Shipping, FedEx Ship, and DHL Express all generate macOS-compatible PDF labels. For multi-carrier volume, Pirateship is free and outputs clean 4×6 PDFs that print without adjustment in Preview.
One last thing
Direct thermal label stock has a shelf life: most rolls degrade within 18–24 months of manufacture, and heat or UV exposure accelerates that. If your labels are printing light or patchy and you have already maxed the darkness setting, the roll is likely old stock. Check the manufacture date printed on the roll's core. Buying in smaller quantities more frequently — rather than a 5,000-label case once a year — keeps your print quality consistent and your barcodes scannable every time.