
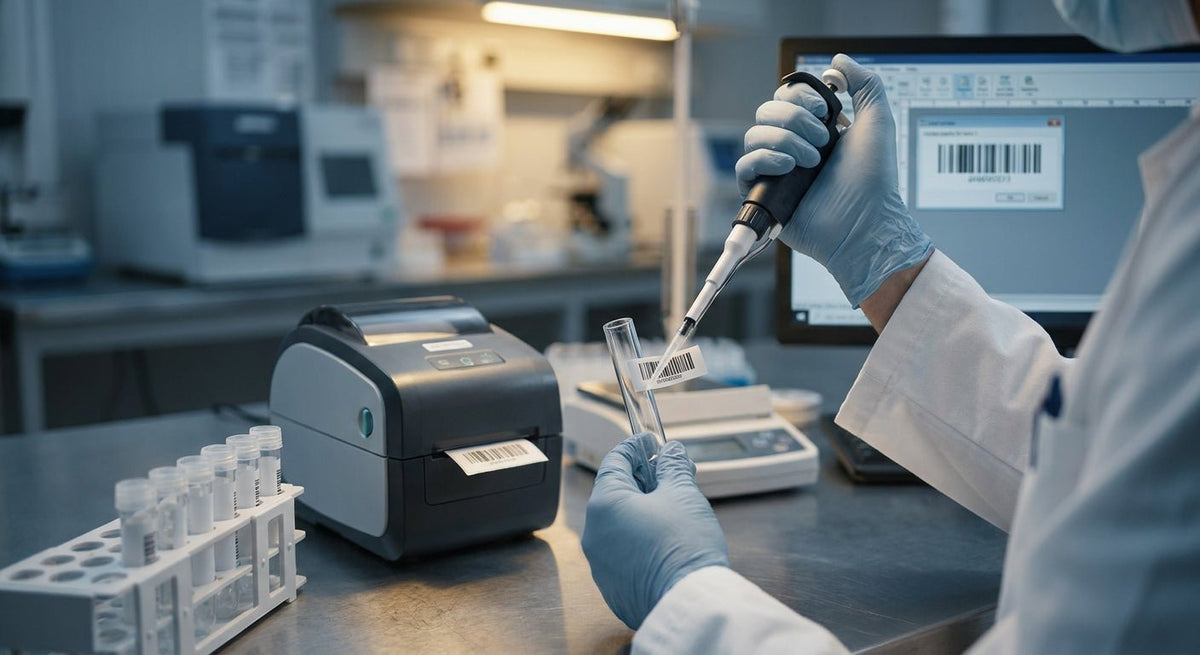
Printing labels for test tubes in a research lab is a precision task — the wrong material, printer setting, or label size costs you samples, audit trails, and compliance sign-offs.
TL;DR: To label test tubes in a lab in 2026, you need a dedicated test tube labeler that wraps a narrow label around a curved surface without gaps or adhesive failure. The Godex GTL-100 test tube labeler handles tubes from 10 mm to 16 mm in diameter and prints at 203 DPI directly from a USB or serial connection. Use cryogenic-rated or solvent-resistant label stock depending on your storage conditions. Get printer settings, label dimensions, and software steps right once, and you can label hundreds of tubes per hour without reprints.
Why this matters
Mislabeled or illegible specimens cause chain-of-custody failures, wasted reagents, and — in clinical settings — patient safety incidents. Standard desktop label printers are built for flat surfaces; a label printed on one and applied by hand to a 13 mm tube will bubble, lift at the seam, or rotate out of position under centrifuge conditions. A purpose-built tube labeler solves all three problems mechanically, not manually.
What you'll need
- Test tube labeler — a printer with a wrap-around applicator head sized for 10–16 mm tube diameters (the Godex GTL-100 covers this range)
- Label stock — narrow direct-thermal labels rated for your storage environment: –80 °C freezer storage requires cryogenic stock; solvent or alcohol exposure requires chemical-resistant polyester
- Label design software — GoLabel (free, Windows-compatible) or ZPL/EPL commands if you are printing from a LIMS
- USB cable or Ethernet connection — the GTL-100 supports USB and serial; add a network print server if your LIMS pushes labels over Ethernet
- Sample data source — your LIMS export, a CSV, or a manually keyed spreadsheet with sample ID, date, and any required barcode or QR symbology
- Time — setup and calibration takes 20–30 minutes on first use; subsequent batches print at speeds up to 4 inches per second
The steps
1. Choose the right label stock for your storage conditions
What it accomplishes: Matches adhesive chemistry and face material to the environment so the label stays legible and bonded through the sample's entire lifecycle.
Why it matters: A standard paper direct-thermal label will turn black in a –80 °C freezer and shed its adhesive in liquid nitrogen vapor. Choosing wrong here is a one-way failure — you cannot re-label a frozen sample mid-study.
Specific instructions:
- Freezer storage (–20 °C to –80 °C): specify cryogenic-rated direct-thermal label stock, typically white polypropylene with acrylic-based cryo adhesive
- Room temperature + chemical exposure (alcohols, xylene, formalin): use polyester (PET) face stock with solvent-resistant adhesive
- Standard bench-top tubes, short-term: standard white direct-thermal paper works and costs less
- Label width for most 13 mm×100 mm tubes: 1 inch × 0.5 inch (25.4 mm × 12.7 mm) is the most common lab wrap size; confirm against your tube diameter before ordering
Expected outcome: A label spec sheet you can hand to purchasing before you order a single roll.
Common mistake: Ordering label stock sized for the tube height rather than the circumference. A 13 mm diameter tube has a circumference of approximately 40.8 mm — your label wrap length must be ≤40 mm or it will overlap and create a raised edge that jams the applicator.
2. Install and configure GoLabel software
What it accomplishes: Gives you a drag-and-drop design canvas and direct USB communication with the GTL-100.
Why it matters: GoLabel outputs native Godex commands, which eliminates the driver translation layer that causes misalignment when printing from generic label apps.
Specific instructions:
- Download GoLabel from the Godex support portal (current version as of 2026 supports Windows 10 and 11)
- On first launch, select "New Printer" → choose GTL-100 from the device list → select your connection type (USB or COM port)
- Set document size to match your label stock: width = label width, height = label height; do not add margins beyond what the printer calibration requires
- Enable "Continuous" feed type if your rolls lack black-mark or gap sensing; otherwise select "Gap" and set gap size to 2 mm
Expected outcome: GoLabel shows a live preview that matches your label dimensions exactly.
Common mistake: Leaving the default A4 or 4×6 document size active. The printer will feed 3–4 blank labels before it finds the first gap, wasting stock and requiring a manual re-calibration.
3. Design your label template
What it accomplishes: Locks field positions so every label in a batch is machine-readable and audit-compliant.
Why it matters: Lab labels at 0.5 inch height leave very little vertical space. Every element must be sized and placed to stay within the printable area — a barcode that clips by even 1 mm will not scan.
Specific instructions:
- Place a Code 128 or QR barcode first — it is the highest-priority element and sets the size constraint for everything else
- For a 1 inch × 0.5 inch label: use a Code 128 barcode at 4 mils bar width, 0.3 inch height; this leaves 0.2 inch for a text line
- Add a human-readable sample ID in 6–8 pt Barlow or a comparable condensed sans-serif so it fits in one line
- Add date printed as a dynamic field (GoLabel's "System Date" variable auto-populates at print time)
- Keep a 0.05 inch margin on all sides to avoid cutoff on tube seam
Expected outcome: A template file (.glb) you save and reuse; swap only the sample ID and date per batch.
Common mistake: Using a font size above 8 pt on a 0.5 inch label. The text runs into the barcode quiet zone, and scanners read the text characters as part of the barcode, producing a no-read.
4. Calibrate the test tube labeler
What it accomplishes: Syncs the printer's motor speed and sensor threshold to your exact label stock and tube diameter.
Why it matters: Mis-calibration is the single most common cause of skewed labels in 2026 lab environments — the wrap starts correctly but drifts 2–3 mm by the time it reaches the back of the tube.
Specific instructions:
- Load the label roll per the GTL-100 guide: feed through the print head, under the platen, and out through the wrap applicator
- Run a calibration feed: hold the Feed button for 3 seconds until the printer advances 3–5 labels automatically
- Adjust tube holder width to match your tube diameter — the GTL-100 has a thumbscrew adjustment; snug but not pinching
- Print 5 test labels onto actual tubes, not flat surfaces — check wrap alignment at the seam and barcode scan rate with a handheld scanner
- If wrap drifts right: increase label gap sensitivity one step in GoLabel's printer settings panel
Expected outcome: 5 out of 5 test labels scan on first pass with no visible skew.
Common mistake: Calibrating on flat stock then loading tube stock. The wrap applicator tension differs between the two; always calibrate with the stock you will actually run.
5. Connect to your LIMS or data source
What it accomplishes: Eliminates manual keying by pulling sample IDs, patient or study identifiers, and timestamps directly from your data system.
Why it matters: Manual entry at the printer is the leading source of transcription errors in lab labeling. A direct LIMS connection makes the label a copy of the record, not an interpretation of it.
Specific instructions:
- If your LIMS exports CSV: use GoLabel's "Database" print mode — point it at the CSV file, map columns to template fields, set quantity = 1 per row
- If your LIMS sends ZPL commands over TCP/IP: set the GTL-100's IP address in its network settings and configure your LIMS print queue to target that IP on port 9100
- If you are printing from a standalone workstation: GoLabel's serial print mode over USB works for batches up to several hundred labels without a network requirement
- Test with 10 real records before running a full batch — verify barcode data, date format, and that no field truncates
Expected outcome: Labels print one-per-record with zero manual intervention per sample.
Common mistake: Using comma-delimited fields that contain commas inside sample names (e.g., "Smith, J."). The CSV parser splits the name mid-field. Use tab-delimited export or wrap text fields in quotes in your LIMS export settings.
6. Run the batch and inspect
What it accomplishes: Produces a full labeled set ready for immediate use or storage.
Why it matters: Catching a bad roll or a drift issue at label 10 costs you 10 labels; catching it at label 200 costs you a day of reprints and a chain-of-custody annotation.
Specific instructions:
- Print the first 10 labels, scan each with a handheld barcode scanner, and confirm readback matches source data exactly
- Check adhesion on a sample tube by pressing label seam firmly for 5 seconds, then inverting the tube — the label should not slide or peel at the edge
- For cryo-rated labels going into –80 °C immediately, confirm the adhesive is rated to bond at the temperature you are applying at (most cryo labels require application at room temperature before freezing)
- Run remaining batch; do a spot scan every 50 labels
Expected outcome: 100% scan rate on completed batch; no lifted edges after application.
Common mistake: Applying cryo labels to cold tubes pulled from the freezer. Condensation prevents adhesive bonding. Always label at room temperature before the tube goes into storage.
Troubleshooting
Labels skewing during wrap The tube holder is too loose. Tighten the thumbscrew so the tube does not rotate during application. Also check that the label roll is seated flush against the left guide — even a 1 mm offset causes cumulative drift.
Barcode not scanning after printing Print density is too low for direct-thermal stock. In GoLabel, increase print darkness by 2 steps (scale is 1–15). If the barcode was designed at below 4 mils bar width, widen it — 203 DPI cannot reliably hold sub-4-mil bars.
Label adhesive failing in freezer You are using standard paper stock, not cryo-rated stock. Cryo labels use a specialized acrylic adhesive that stays tacky at –80 °C; standard thermal paper adhesive turns brittle and releases.
GoLabel not detecting the printer Check that the USB cable is connected before launching GoLabel, not after. On Windows 11, also verify the Godex USB driver installed correctly — check Device Manager for an "Unknown Device" entry under the USB controllers section.
Labels printing blank Direct-thermal stock is loaded with the coated side facing away from the print head. Flip the roll so the thermal coating faces the print head — the GTL-100's print head contacts the top of the label as it feeds.
Date field printing as literal text "[System Date]" The field was typed manually instead of inserted via GoLabel's variable menu. Delete the text object and re-insert using Object → Variable Data → System Date.
Tools and resources
- Godex GTL-100 test tube labeler — purpose-built wrap applicator for 10–16 mm tubes, 203 DPI, USB and serial interfaces
- GoLabel label design software — free download from Godex, Windows 10/11 compatible, supports variable data and CSV database printing
- Cryogenic direct-thermal label stock — order in 1 inch × 0.5 inch rolls sized to your tube diameter
- Handheld barcode scanner for batch verification — the Godex GS220 USB barcode scanner pairs directly with a workstation for post-print verification
- Label printer for test tubes in clinical labs — covers clinical-specific compliance requirements and label content standards
What to do next
Once your batch labeling process is running cleanly, the next operational gap is usually specimen tracking after the tube leaves the bench. Read the guide on test tube labeler for clinical and research labs for chain-of-custody workflows, LIMS integration patterns, and label content requirements by sample type.
FAQ
What is the best way to label test tubes in a lab? Use a dedicated test tube labeler with a wrap applicator — not a standard flat-label printer. A purpose-built labeler like the Godex GTL-100 wraps the label mechanically around the tube at consistent tension, which eliminates the seam gaps and skew that cause scan failures.
What label size is standard for test tubes? 1 inch × 0.5 inch (25.4 mm × 12.7 mm) is the most common size for 13 mm diameter tubes in 2026 research labs. Wider tubes (16 mm) may use 1.25 inch × 0.5 inch. Always calculate circumference before ordering: diameter × 3.14159 gives you the maximum wrap length.
Can I use a regular thermal label printer for test tubes? A standard desktop thermal printer produces the label, but it cannot apply it to a curved surface accurately. You still need a wrap applicator or manual application with a label dispenser. For volume above 50 tubes per day, a dedicated test tube labeler is faster and more consistent.
What label material works in a –80 °C freezer? Cryogenic-rated polypropylene or polyester labels with acrylic cryo adhesive. Standard direct-thermal paper labels fail below approximately –20 °C — the adhesive releases and the thermal coating loses contrast.
How do I print barcodes on test tube labels? Design a Code 128 or QR code barcode in GoLabel at a minimum 4 mils bar width, sized to fit within the label height. Connect to your LIMS or CSV and use variable data printing so each label carries the correct unique sample ID. Print at 203 DPI minimum; 300 DPI improves scan reliability on small labels.
How do I connect my test tube labeler to a LIMS? Two paths: CSV export (GoLabel reads the file directly and prints one label per row) or TCP/IP raw port 9100 if your LIMS supports direct network printing. Most lab LIMS platforms in 2026 support one or both. Confirm your LIMS uses ZPL or Godex command language if printing over the network.
How many labels per hour can a test tube labeler print? The Godex GTL-100 prints at up to 4 inches per second. At that speed with 0.5 inch labels, the mechanical throughput is approximately 480 labels per minute — real-world throughput in a manual tube-feed workflow runs 200–400 labeled tubes per hour depending on operator pace.
Is GoLabel software free? Yes. Godex distributes GoLabel at no charge for all Godex printer models including the GTL-100. It runs on Windows 10 and 11 as of 2026 and supports variable data, database CSV printing, and barcode symbologies including Code 128, QR, and Data Matrix.
One last thing
The most overlooked spec in lab label purchasing is application temperature, not storage temperature. A cryogenic label rated to –196 °C will still fail if you apply it to a tube that was just pulled from the freezer at –80 °C. Condensation forms within seconds, and the adhesive never bonds properly — the label appears stuck but peels within 24 hours back in storage. Apply every label at room temperature, dry surface, before the tube goes in. That single habit eliminates the majority of label loss events in high-throughput research labs.