A quick, step-by-step guide to fix misaligned, skipped, or overlapping labels on GoDEX thermal printers (DT series, RT700i+, RT/RTi, ZX industrial). Works for both gap and black-mark labels in Direct Thermal and Thermal Transfer modes.
When You Should Calibrate
- Labels print too high/low or start in the middle of the gap
- The printer feeds multiple labels before printing
- After changing label size, material, core, or sensor type
- After cleaning the print head or moving the media sensor
Step 1 — Load Labels Correctly
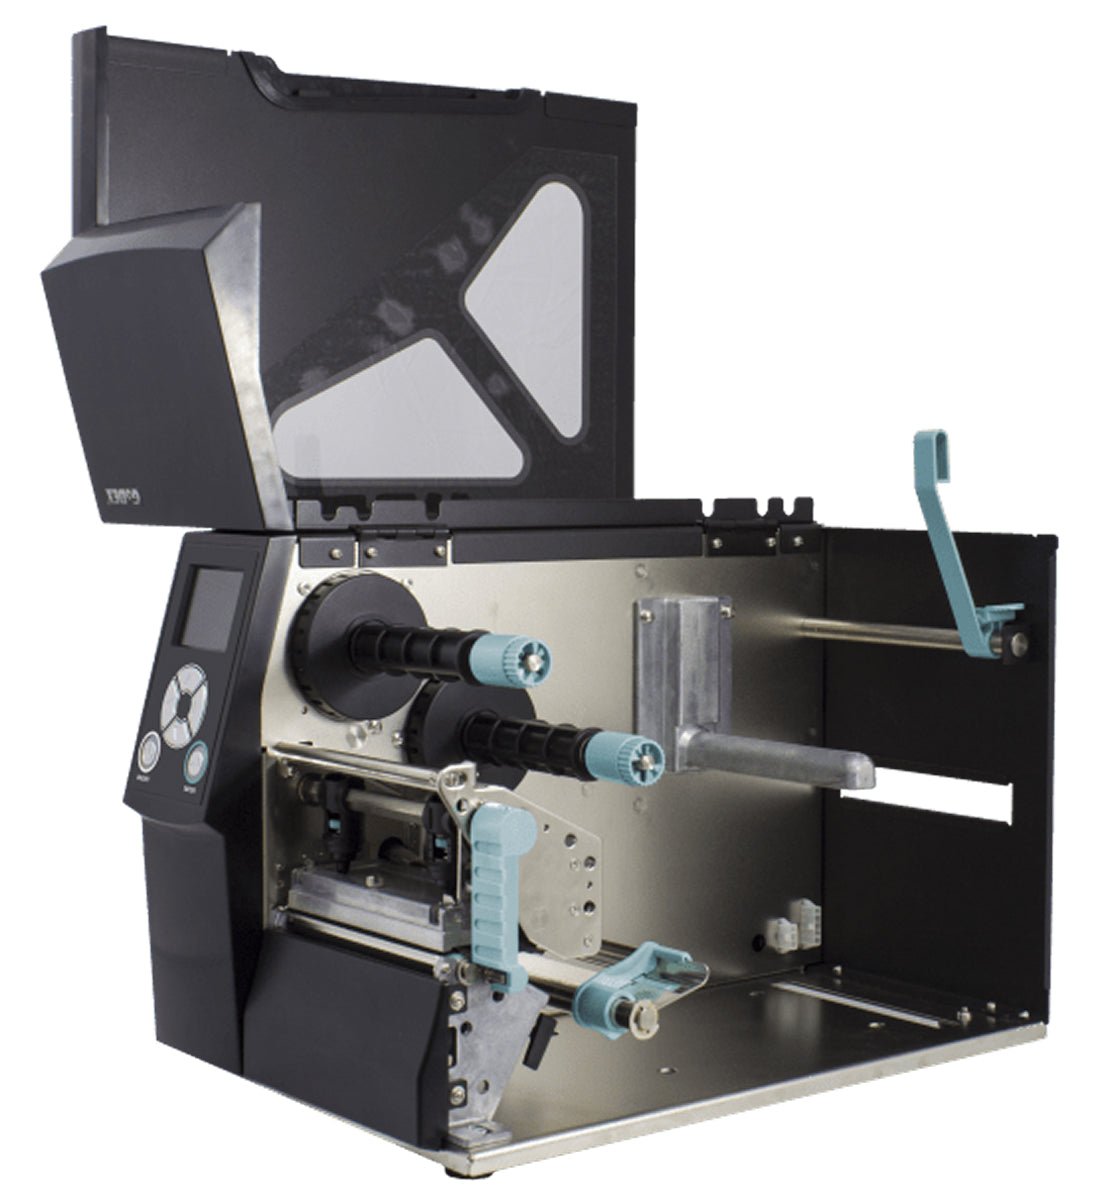
Open the cover and load your roll so the print surface faces the print head. Slide the media guides in until they just touch the liner. Ensure the roll spins freely and isn’t rubbing the housing.
Tip: For fanfold labels, feed from the rear slot and keep the stack straight to avoid side drift.
Step 2 — Set the Correct Sensor Type
GoDEX detects labels using either a Gap sensor (die-cut gap) or a Black Mark sensor (black line on the liner). Most shipping labels use Gap. On adjustable-sensor models, position the sensor under the gap or mark the path.
- Gap labels: center sensor or place under the gap channel
- Black mark labels: align sensor with the printed mark path (usually off-center)
Step 3 — Hardware Auto-Calibration
Use your printer’s onboard “Calibrate/Feed” routine to learn the label pitch before software setup.
RT700i+ (and most RT/RTi models)
- Power on. Load labels and close the cover.
- Press and hold Feed until the status LED flashes → release. The printer feeds several labels and stops at the top of the next one.
DT4x / DT series
- Power on. Hold Feed for ~4 seconds until the LED blinks; release.
- The printer measures the label/gap automatically.
ZX industrial series
- From the front panel, go to Setup > Media > Auto Calibrate and run.
- Alternatively, hold the Feed key on boot until “Calibrating” appears.
Result: After a successful routine, one press of Feed should advance exactly one label.
Step 4 — Software Calibration in GoLabel
Open GoLabel (free with all GoDEX printers) and match your document to the physical label.
- Choose Printer: File → Printer Setup → select your GoDEX model/port.
- Label Size: File → Stock → set width/height (e.g., 4.00" × 6.00").
- Sensor Type: Stock → Media Type = Gap or Black Mark; set mark offset if required.
- Print Mode: Stock → Direct Thermal or Thermal Transfer (if using ribbon).
- Calibrate: Printer → Tools → Auto Calibration (or run from driver properties).
- Test Print: Print a sample template and verify the top/tear line.
Tip: If the image starts slightly low/high, adjust Top of Form (TOF) / Vertical Offset by ±1–2 mm in Driver → Preferences.
Step 5 — Dial In Print Quality
- Darkness (Heat): Increase for faint bars; decrease to prevent bleeding.
- Speed: For dense barcodes/small text, slow to 3–4 ips for maximum sharpness.
- DPI: Use 300 DPI for small labels or high-density barcodes when available.
Quick Troubleshooter
| Symptom | Likely Cause | Fix |
|---|---|---|
| Skips 1–2 labels before printing | Wrong sensor type / sensor not centered | Set to Gap vs Black Mark correctly; reposition sensor; run auto-cal. |
| Starts mid-label / prints over gap | Label size mismatch or TOF offset | Match size in GoLabel & driver; adjust Vertical Offset ±1–2 mm. |
| Faded or patchy print | Dirty head / wrong media mode | Clean head with IPA swab; ensure Direct vs Transfer mode matches media. |
| Labels drift sideways | Guides too loose / roll rubbing | Tighten guides; ensure roll turns freely and media path is square. |
| Reads black mark unreliably | Sensor not under mark / low contrast | Align sensor to mark track; increase mark darkness; re-calibrate. |
Maintenance That Improves Alignment
- Clean print head every 1–2 rolls (isopropyl alcohol, printer off and cool).
- Wipe platen roller to remove adhesive buildup; rotate while cleaning.
- Use quality media with a consistent gap/mark; avoid crushed cores.
- Store labels flat, away from heat/sun to prevent warping.
Get Help Fast
Still not aligned? Check our GoLabel setup page for screenshots, or message info@mcauleylabels.com. All GoDEX printers from McAuley Labels include a 3-Year Warranty and expert setup help.
ZX420i+/ZX430i+ Calibration Example
FAQ
- Do I need to calibrate every time I change rolls?
- Not always. If the size, liner color, or sensor type changes, run a quick auto-calibration.
- What’s the difference between Gap and Black Mark?
- Gap = a die-cut space between labels. Black Mark = a printed mark on the liner used for detection, common on special shapes or clear media.
- My 4×6 labels print short by 2–3 mm. How do I fix it?
- Adjust Vertical/TOF offset in the driver or GoLabel by small steps (±1–2 mm) and re-test.
- Will 300 DPI change alignment?
- No, DPI affects detail and speed, not label sensing. Calibrate once per media change.
- Direct Thermal vs Thermal Transfer — does it affect calibration?
- No. Sensing uses the gap/mark; print mode only changes how the image is created.