
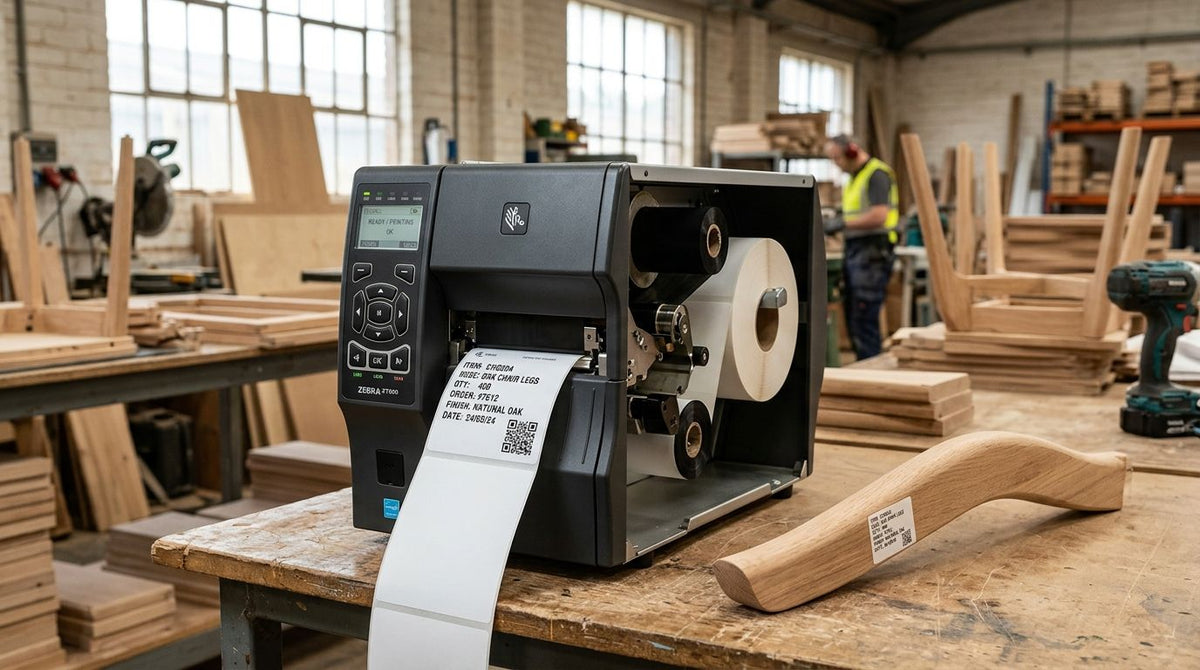
Industrial label printer for furniture manufacturers is a thermal barcode printer built to run on cutting-room, assembly, and warehouse floors — printing component tags, work orders, and asset labels that survive sawdust, stain contact, and repeated handling. A shipping-label printer bought for a retail stockroom won't cut it here: furniture production moves parts through kilns, finishing booths, and outdoor loading docks, and each stop puts different stress on the label.
- The GoDEX ZX430i+ 300 DPI thermal transfer printer handles dense barcodes on small hardware and component tags for furniture manufacturers in 2026.
- Thermal transfer beats direct thermal for anything that passes near a finishing line — direct thermal fades under heat and stain contact.
- 3M heavy-duty silver asset tags hold up on metal frame hardware; standard paper labels lift off laminate and veneer.
- Match resolution to part size: 203 DPI covers pallets, 300 DPI covers hardware components, 600 DPI is for fine text or dense QR codes.
Why an industrial label printer matters for furniture manufacturers
Furniture production runs through more distinct environments than most manufacturing floors: cutting and kitting, upholstery, hardware assembly, finishing (stain, lacquer, heat), and warehouse racking before shipment. A label that works fine in the cutting room can smear or peel by the time the piece reaches the loading dock.
The cost of getting this wrong shows up as mislabeled SKUs, illegible barcodes at the pick station, and asset tags that fall off metal hardware after a few months on the shop floor. An industrial label printer for furniture manufacturers has to match resolution, ribbon type, and adhesive to the substrate at each stage — not just print a barcode. Get the resolution and label stock right once, and the same setup runs consistently from cutting room to shipping dock in 2026 and beyond.
How to set up label printing for a furniture manufacturing floor
1. Map every labeling point on the production floor
Before buying anything, walk the line and note where a label actually needs to live.
- Cutting and kitting stations — component identification tags
- Assembly stations — work-order and build-sheet labels
- Finishing line — heat- and chemical-exposed tags
- Warehouse — pallet labels and equipment asset tags
- Shipping dock — carton and freight labels
2. Choose thermal transfer over direct thermal for anything that leaves the building
Thermal transfer uses a wax, wax/resin, or resin ribbon fused onto the label; direct thermal uses heat-sensitive paper with no ribbon. For furniture manufacturing, the choice isn't cosmetic — it decides whether the label survives.
- Thermal transfer resists heat, UV, and chemical exposure — use it for anything near a finishing line or headed outdoors
- Direct thermal labels fade near ovens, sunlight, or stain fumes — reserve them for short-life internal tags like same-day work orders
- Check ribbon type against label stock: resin ribbons pair with polyester and metalized labels, wax/resin works for general paper stock
- The GoDEX ZX430i+ 300 DPI thermal transfer printer prints small, dense barcodes for hardware components and holds up to daily shop-floor use
3. Match label material to the substrate, not just the printer
A printer prints whatever stock you load — the stock has to match what the label is sticking to.
- 3M heavy-duty or metalized silver stock for metal hardware and frame components
- Semi-gloss white for cardboard, particleboard, or interior packaging
- Polyester for curved, textured, or oily surfaces where paper won't grip
- Skip standard paper labels on laminate and veneer — they lift under normal handling
4. Set barcode density and resolution for your smallest part
Resolution decides how small a barcode can print before it stops scanning.
- 203 DPI is enough for pallet labels, cartons, and general work orders
- 300 DPI handles dense barcodes on small hardware components — hinges, screws, connector plates
- 600 DPI is reserved for fine text or tightly packed QR codes on tiny parts
- Test the actual label at production size before ordering a full run — a barcode that looks fine on screen can fail a scanner once scaled down
5. Standardize one barcode format across cutting, assembly, and shipping
Mixing barcode symbologies between departments is how traceability breaks down.
- Pick Code 128 or QR and use it everywhere
- Print the same identifier on the component tag and the finished-good label
- Build the label layout once in your design software so every station reprints the identical format
- Confirm scanners at every station read the chosen symbology before rollout
6. Plan ribbon and rewind capacity before a high-volume run
Running out of ribbon mid-shift stops the line — plan capacity ahead of the batch, not during it.
- Measure ribbon length against your expected print run before starting
- Keep spare thermal transfer ribbon on hand instead of reordering per job
- Add a rewinder for continuous multi-hour label runs on high-volume lines
- Match ribbon width to label width — oversized ribbon wastes material, undersized ribbon leaves print gaps
7. Test labels under real shop conditions before switching printers
A label that looks perfect fresh off the printer can fail after a shift on the floor.
- Run a sample through your saw dust, stain booth, and warehouse racking before committing to a full order
- Check adhesion after 24 hours, not immediately after printing
- Confirm barcode scans after handling, not just off the press
- Test in the coldest and warmest area of the shop if temperature swings between seasons
Compare label printer options for furniture manufacturers
| Option | Best for | Key limitation |
|---|---|---|
| GoDEX ZX430i+ (300 DPI thermal transfer) | Dense barcodes on small hardware and component tags | Requires ribbon and periodic calibration |
| GoDEX RT700i+ (203 DPI thermal transfer) | General work-order and pallet labels | Lower resolution blurs small text and dense QR codes |
| GoDEX GX4200i (203 DPI, up to 16 IPS) | High-volume production lines running continuous batches | Larger footprint, needs network setup for multi-station use |
| Direct thermal labels (no ribbon) | Short-life internal tags like same-day work orders | Fades under heat, UV, or stain exposure — not for anything long-term |
Verdict: the GoDEX ZX430i+ wins for furniture manufacturers labeling hardware and components, because 300 DPI is the minimum resolution that keeps small barcodes scannable at production speed in 2026.


Common mistakes furniture manufacturers make with label printers
- Running direct thermal near the finishing line — labels fade or smear from stain and heat contact instead of lasting the life of the product.
- Using paper labels on laminate or veneer — the adhesive won't grip a textured or oily wood surface, and tags fall off in transit.
- Printing hardware barcodes at 203 DPI — small parts need 300 DPI density to stay scannable at production speed.
- No shared identifier between the cutting room and the shipping label — traceability breaks the moment a defect surfaces after delivery.
- Skipping a ribbon capacity check before a large batch run — running dry mid-shift halts the line until someone finds a spare roll.
FAQ
What's the best industrial label printer for furniture manufacturers in 2026?
The GoDEX ZX430i+ is the best fit for most furniture manufacturers in 2026 because its 300 DPI resolution keeps dense barcodes readable on small hardware and component tags. Higher-volume lines running continuous batches should look at the GoDEX GX4200i, which runs up to 16 IPS.
Is direct thermal or thermal transfer better for furniture labels?
Thermal transfer is better for furniture manufacturing because it resists heat, chemical exposure, and UV, which direct thermal cannot handle near a finishing line. Reserve direct thermal for short-life internal tags like same-day work orders.
What DPI do I need for furniture component barcodes?
300 DPI is the minimum for small hardware components like hinges, screws, and connector plates. 203 DPI works fine for pallet and carton labels where the barcode prints larger.
Can asset tags be used on wood furniture frames?
Metalized silver or 3M heavy-duty asset tags adhere well to painted or sealed wood frames, but raw or oily surfaces need testing first since adhesion varies by finish. Polyester stock generally outperforms paper on textured surfaces.
How do I label small furniture hardware without covering the part?
Use a 300 DPI or 600 DPI printer to shrink the barcode without losing scan accuracy, and choose a compact label size matched to the hardware footprint. Test the scan at the reduced size before printing a full batch.
What label material survives a wood finishing line?
Polyester or metalized silver labels printed with a thermal transfer ribbon hold up against stain, lacquer, and heat exposure on a finishing line. Standard paper labels degrade quickly in that environment.
Do furniture manufacturers need a network-connected label printer?
Multi-station operations benefit from network-connected printers like the GoDEX GX4200i, which supports USB, Serial, and Ethernet for shared use across cutting, assembly, and shipping. Single-station shops can run a standalone printer without networking.
What's the difference between 203 DPI and 300 DPI for furniture labels?
203 DPI prints coarser barcodes suited to pallets and cartons, while 300 DPI packs more detail into a smaller barcode for hardware and component tags. Choosing too low a resolution for small parts causes scan failures at the pick station.
One last thing
The detail most furniture manufacturers skip: print speed matters as much as resolution once a line runs continuously. The GoDEX GX4200i prints up to 16 IPS at 203 DPI — fast enough to keep pace with a moving assembly line without creating a labeling bottleneck. A high-resolution printer that can't match line speed just moves the delay from the barcode to the printer queue.