
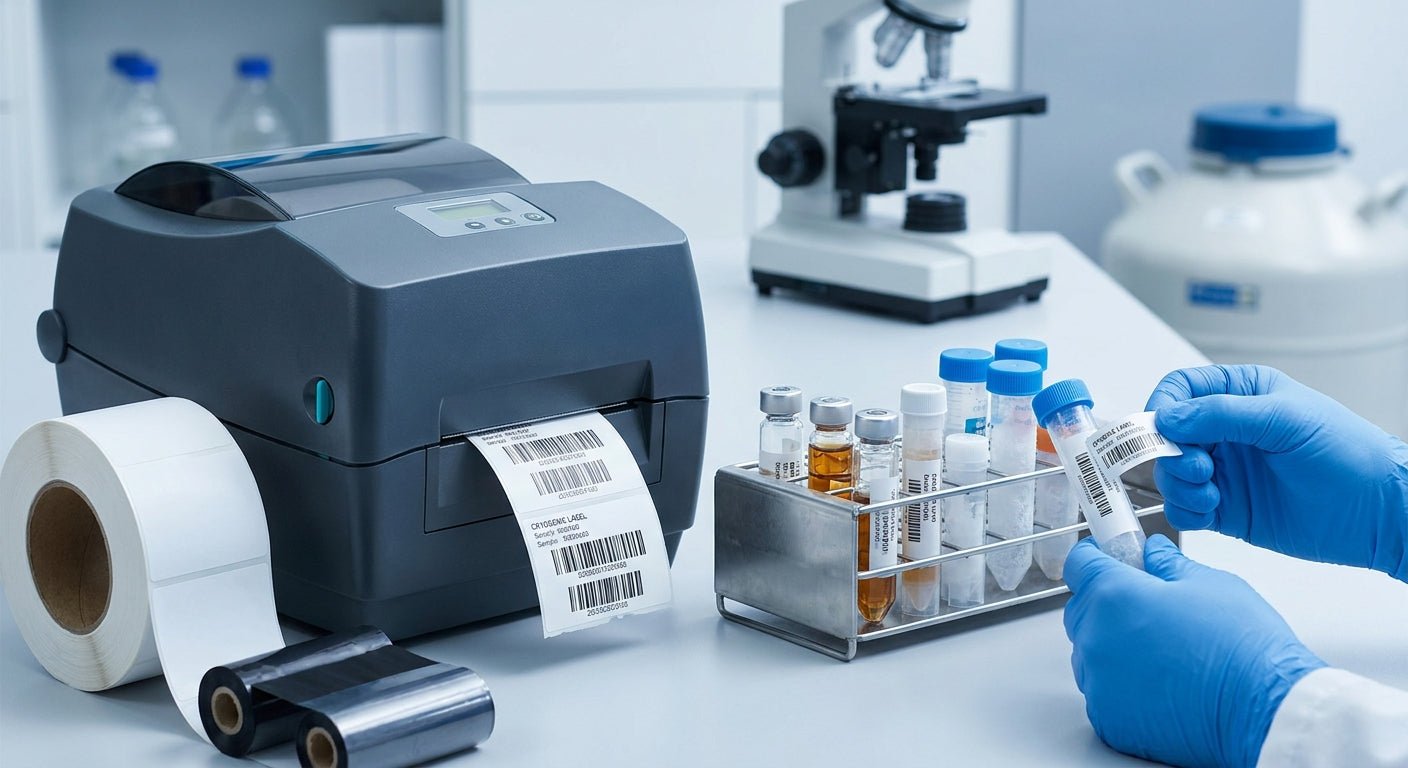
Cryogenic labels have to survive liquid nitrogen at -196°C, then get scanned without a smear or a peel. Get the print method wrong and you lose the sample ID exactly when you need it most.
TL;DR: Print cryogenic labels for lab samples with a thermal transfer printer at 300 or 600 DPI, resin ribbon, and a cryo-rated polyester or polypropylene facestock — direct thermal labels fade and crack below -20°C, so they're a Skip for freezer or LN2 storage. McAuley Labels' GoDEX RT863i (4", 600 DPI) handles small barcodes and 2D codes on vial-sized labels down to 0.5" wide, and resin ribbon holds ink through freeze-thaw cycles that would strip standard wax ribbon. If your lab runs test tubes, blood draws, or biobank vials in 2026, this is the setup that keeps IDs legible after a -80°C pull.
Why this matters
A lab sample without a readable label is a lost sample, full stop. Cryostorage puts labels through condensation, frost, alcohol wipes, and repeated freeze-thaw — conditions that destroy inkjet and most direct thermal prints within a few cycles.
The fix isn't exotic. It's picking resin thermal transfer over direct thermal, matching DPI to your barcode density, and using facestock rated for sub-zero storage. Get those three right and cryogenic labels for lab samples outlast the samples themselves.
What you'll need
- A thermal transfer printer — 300 DPI minimum, 600 DPI if you're printing 2D barcodes on 0.5" or 1" tube labels
- Resin ribbon (not wax or wax-resin) — resin holds up against alcohol, glycerol, and sub-zero freezing
- Cryo-rated label stock: polypropylene or polyester facestock with an adhesive rated for -196°C
- Label design software (GoLabel or equivalent) to build barcode and 2D QR templates
- A sample tracking spreadsheet or LIMS export to feed variable data (sample ID, date, collection site) into the print run
- 15-30 minutes for calibration before your first production run
The GoDEX RT863i thermal printer covers the 600 DPI end of this list in one unit — it's the printer most labs reach for when tube labels shrink below 1 inch and barcode density climbs.
The steps
1. Choose thermal transfer over direct thermal
Direct thermal printing burns the image directly into heat-sensitive paper — no ribbon involved. That's fine for a shipping label that lives a week. It's the wrong call for anything going into a -20°C freezer or LN2 dewar, because the thermal coating degrades under cold and light exposure and the print fades within months.
Thermal transfer melts resin ribbon onto a durable facestock, and that image doesn't rely on the substrate's chemistry to stay dark. Verdict: thermal transfer is a Buy for cryo work, direct thermal is a Skip.
Common mistake: ordering direct thermal labels because they're cheaper per roll, then reprinting the whole batch three months later when the codes go blank.
2. Match ribbon type to storage temperature
Wax ribbon is the cheapest resin alternative and it's fine for warehouse cartons. It is not fine for cryostorage — wax ribbon cracks and flakes off polyester or polypropylene facestock once it's been frozen and thawed a few times.
Resin ribbon fuses to the label surface at a higher melt point, so it survives repeated -80°C freezer pulls and alcohol wipe-downs without smearing. Stock thermal transfer ribbon rated for resin printing, not the general-purpose wax-resin blends sold for retail labels.
Expected outcome: barcodes still scan clean after 10+ freeze-thaw cycles, a common benchmark labs use when validating a new label stock in 2026.
3. Pick the right facestock and adhesive
Cryo labels need two things standard labels don't: a facestock that stays flexible below freezing, and an adhesive that doesn't release when condensation forms on the tube. Polyester and polypropylene facestocks handle both — paper labels get brittle and the adhesive lets go the moment frost forms.
Thermal transfer polyester white labels are the standard choice for tube and vial work because the white background gives you contrast for small barcodes without adding an ink layer that could crack.
Common mistake: reusing general-purpose barcode label stock left over from a warehouse order. It'll print fine at room temperature and fail the first time it hits -196°C.
4. Set your DPI based on barcode density
A 300 DPI printer handles standard 1D barcodes and text on tube labels 1 inch or larger with no issue. Once you're printing a 2D data matrix or QR code on a label under 0.75 inch — common on cryovials and microcentrifuge tubes — you need 600 DPI to keep the modules sharp enough to scan reliably.
The RT863i prints at 600 DPI across a 4-inch print width, so a single printer covers both your standard tube labels and your smallest cryovial codes without swapping hardware.
Expected outcome: a 2D code at 600 DPI on a 0.5" label scans on the first pass with a standard handheld scanner. At 203 DPI the same code often needs two or three scan attempts as modules blur together.
5. Calibrate before your first production batch
Run a calibration cycle before printing live sample labels — most thermal transfer printers need the sensor to read the label gap and ribbon tension before output is consistent. Skipping this step is the single most common reason a first batch prints with shifted text or partial barcodes.
Print a test sheet of 10-20 labels, scan every barcode, and check registration against the label edge. If more than one in ten labels misreads, recalibrate before you commit a full roll to sample IDs you can't reprint later.
Common mistake: calibrating once and assuming it holds forever — ribbon tension drifts as a roll runs low, so recheck after every ribbon change.
6. Build variable data into your label template
Static labels don't scale past a handful of samples. Set up a template in your label design software that pulls sample ID, collection date, and site code directly from a spreadsheet or LIMS export, so each label prints unique data without manual entry.
This also cuts transcription errors — the single biggest source of mislabeled samples in manual workflows, according to lab operations reporting through 2026.
Expected outcome: a batch of 96 or 384 unique tube labels (matching standard plate formats) prints in one run with zero manual retyping.
7. Test a batch under real storage conditions before full rollout
Before committing your whole sample collection to a new label and ribbon combination, freeze a test batch for at least one full freeze-thaw cycle at your actual storage temperature — whether that's -20°C, -80°C, or liquid nitrogen at -196°C.
Scan every label after thaw. If adhesion or print quality drops, you've caught it on a test batch instead of your production samples.
Verdict: skip this step and you're gambling the whole freezer on an untested combination.
Troubleshooting
- Barcode won't scan after freezing — check ribbon type first; wax ribbon cracking is the most common cause. Switch to resin ribbon rated for cold storage.
- Label peels off inside the freezer — the adhesive isn't cryo-rated. Standard adhesive loses tack below -20°C; you need a facestock built for sub-zero use.
- Print looks faded before the sample even goes in storage — this points to direct thermal media being used instead of thermal transfer. Confirm the printer is loaded with ribbon, not printing direct.
- Text is legible but registration shifts left-right — recalibrate the printer's label gap sensor; ribbon tension or label stock thickness changed since the last calibration.
- 2D barcode reads inconsistently — check DPI against label size. Under 0.75 inch with a 2D code, 300 DPI often isn't enough resolution; move to 600 DPI.
- Condensation smears the print immediately after removal from LN2 — this is normal moisture, not a print failure. Resin ribbon on polyester facestock resists it; wax ribbon or paper stock does not.
Tools and resources
- GoDEX RT863i thermal printer, 4-inch, 600 DPI — the resolution floor for small cryovial barcodes
- Thermal transfer ribbon — resin-grade, rated for cold storage durability
- Thermal transfer polyester white labels — the facestock standard for tube and vial work
- GoLabel or equivalent label design software for variable data templates
- A handheld or fixed barcode scanner rated for the code density you're printing
What to do next
Once your cryogenic label setup is running, the printer choice matters as much as the label stock. Read best label printer for laboratory test tubes for a side-by-side on printer models built for tube-scale label runs, and how to choose between direct thermal and thermal transfer if you're still weighing print methods for other label types in your lab.
FAQ
What's the best printer for cryogenic labels for lab samples? A thermal transfer printer at 300-600 DPI with resin ribbon is the standard, and the GoDEX RT863i at 4-inch, 600 DPI covers both standard tube labels and small 2D codes on cryovials.
Is direct thermal or thermal transfer better for freezer labels? Thermal transfer wins for anything stored below -20°C. Direct thermal print fades and the coating degrades in cold storage within months, making it a poor fit for cryogenic use.
How much DPI do I need for a cryovial label? 300 DPI works for standard barcodes on labels 1 inch or larger; 600 DPI is needed for 2D data matrix codes on labels under 0.75 inch to keep the modules scannable.
Can labels survive liquid nitrogen at -196°C? Yes, when printed with resin ribbon on a polyester or polypropylene facestock rated for cryogenic use. Wax ribbon and paper facestock typically fail at that temperature.
How many freeze-thaw cycles should a cryo label survive? Labs commonly validate label stock against at least 10 freeze-thaw cycles before rolling it into production sample storage in 2026.
Do I need special adhesive for cryogenic vials? Yes. Standard adhesive loses tack below -20°C and releases under condensation; cryo-rated adhesive is formulated to hold through both.
What causes cryo labels to fail after only a few uses? The two most common causes are wax ribbon cracking and non-cryo-rated adhesive releasing under frost or condensation. Both are fixed by switching to resin ribbon and a cold-rated facestock.
Should I calibrate my printer before every batch? Calibrate after every ribbon change at minimum, since ribbon tension drifts as a roll runs low and that drift shows up as shifted print registration.
One last thing
Most labs that switch to cryogenic labels for lab samples in 2026 don't fail on the printer — they fail on the ribbon. A 600 DPI printer loaded with wax ribbon still cracks at -80°C; resin ribbon on a 300 DPI printer often outlasts it. If you only upgrade one component this year, upgrade the ribbon first.