
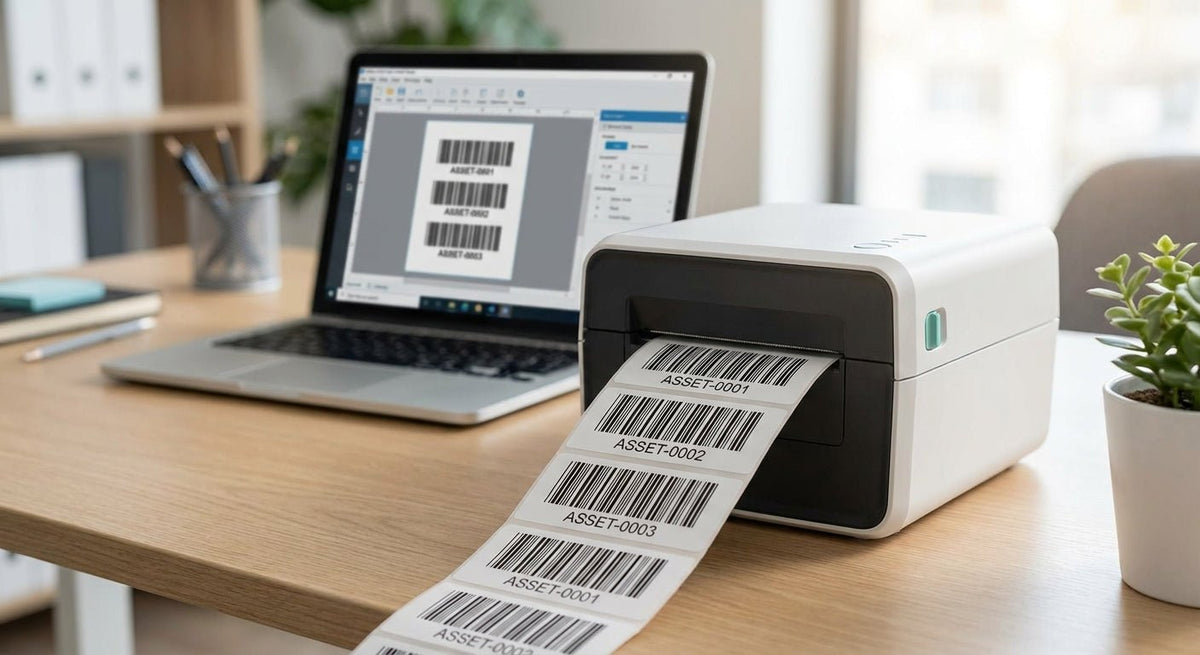
Printing sequential numbered asset tags in 2026 takes under 10 minutes once your label template and printer are configured correctly — here is the exact process.
TL;DR: To print sequential numbered asset tags in 2026, you need a thermal label printer (203 DPI minimum), label design software with a counter or serialization field, and the right label stock — metalized silver polyester for metal surfaces, semi-gloss white for indoor equipment. Set your start number, increment value, and total quantity in the software's serial field, load your labels, and print the full run in one batch. McAuley Labels carries both the printers and pre-configured asset tag stock to complete this in a single order.
Why sequential numbering matters
A tag without a unique number is decoration. Sequential numbers tie every physical asset to exactly one record in your spreadsheet, CMMS, or tracking system. When a tag reads "000247" there is no ambiguity — audits run faster, lost equipment surfaces faster, and duplicate records stop compounding. In 2026, most IT and facilities teams that still use manually assigned numbers average 12–18% duplicate records in their asset databases. A sequential print run eliminates that from the start.
What you'll need
Before you start, confirm you have all of this on hand:
- Thermal label printer — 203 DPI handles readable barcodes; 300 DPI is better for small fonts or dense barcodes on asset tags. A printer like the GoDEX RT230i 300 DPI handles both direct thermal and thermal transfer stock.
- Label design software — GoLabel (free with GoDEX printers), Bartender, NiceLabel, or ZPL-based utilities all support serialization fields.
- Asset tag label stock — Metalized silver polyester for equipment exposed to heat, solvents, or outdoor conditions; semi-gloss white for office IT gear. McAuley Labels' asset tags with barcode — metalized silver ship pre-sized and pre-wound for thermal printers.
- Thermal transfer ribbon — Required if you are printing on polyester or any non-direct-thermal stock. Resin or resin-blend ribbon resists smearing on metallic labels.
- Your starting number and format — Decide now: numeric only (000001), alphanumeric (IT-000001), or with a site prefix (CHI-IT-0001). Changing formats mid-run creates sorting headaches.
- Time: 30 minutes for initial setup; under 5 minutes per subsequent run.
Steps
Step 1: Install and open your label design software
Download GoLabel from the GoDEX support site or use your existing label design application. Connect the printer via USB or network. In 2026, most GoDEX models appear as a standard printer port with no additional driver step on Windows 10/11. Open a new label project and set the label dimensions to match your stock exactly — a 2" × 1" asset tag requires a 2.00" × 1.00" canvas, not an approximation. A 0.05" canvas mismatch causes every label to print offset from the gap sensor.
Common mistake: Setting media type to "continuous" when your roll is gap-label stock. The printer will not feed correctly and the counter will not increment per label. Set media sensing to "gap" before printing a single test label.
Step 2: Design your label template
Build one template that covers every run. Standard asset tag layouts in 2026 include: a sequential number in large human-readable text (14–18 pt), a barcode (Code 128 or Code 39) encoding the same number, a fixed header line (your company name or department abbreviation), and optionally a QR code linking to an asset record URL.
Keep the sequential number field and the barcode data field linked to the same variable — most label software calls this a "counter" or "serial" object. When both objects point to the same variable, they increment together. If you link them separately, they drift apart after the first roll change.
Expected outcome: A template where every data element is either fixed text or tied to the single counter variable.
Step 3: Configure the serialization field
Locate the counter or serialization settings panel in your software. Set three values:
- Start value — the first number in this batch (e.g., 000001, or 001500 if continuing an existing series)
- Increment — almost always 1 for sequential tags
- Total count — the exact quantity you want to print
Pad numbers with leading zeros to a fixed digit width (6 digits is standard). "000247" sorts and scans correctly; "247" does not sort correctly when your database reaches "1000".
Common mistake: Leaving the counter set to "reset on each print job." In most software this is a checkbox labeled "Reset counter" or "Restart from start value." Uncheck it if you are printing in batches across multiple sessions and want continuous numbering.
Step 4: Load label stock and ribbon
Load your asset tag roll with the label face up and the backing liner feeding under the platen roller. For metalized silver polyester, load a resin-compatible thermal transfer ribbon — matte silver polyester stock rejects wax ribbon entirely and the print will wipe off with a fingernail.
Run a calibration feed: on most GoDEX printers, hold the Feed button for 3 seconds with the cover closed. The printer advances one or two labels to detect the gap and sets the label length register. Skip this step and the first label of every batch prints 3–5 mm low.
For detailed calibration steps, see how to calibrate a thermal label printer.
Step 5: Print one test label — verify before committing the run
Send a single label to the printer. Before printing the full batch, check four things:
- Barcode scans correctly with a phone or handheld scanner
- Human-readable number matches the barcode data
- Print is centered within the label face (±1 mm tolerance)
- Ribbon did not wrinkle or the direct thermal print shows solid density — no faded bands
If the barcode does not scan, increase print darkness by 2 points in the printer driver and retest. Do not print 500 labels and then scan.
Common mistake: Testing the scan in bright overhead light only. Scan under your actual field conditions — on a metal rack under fluorescent lights, on a black equipment chassis, outdoors in direct sun.
Step 6: Run the full batch
With the test label confirmed, set the print quantity to your full run count and send the job. The printer increments the counter automatically with each label ejected. For runs over 500 labels on a single roll, load a fresh roll before starting — a roll change mid-run does not reset the counter in properly configured software, but verifying continuity after the roll change takes 30 seconds and is always worth doing.
Expected outcome: A complete roll of sequentially numbered, scan-verified asset tags ready to apply in 2026.
Step 7: Log the series in your asset register
Before you apply a single label, record the start number, end number, batch date, and printer configuration file name in your asset management system. In 2026, teams that log batch metadata recover from mislabeled equipment in minutes rather than days. A CSV row with five fields — batch ID, start, end, date, stock type — is sufficient.
Troubleshooting
Counter resets to start value mid-run The software counter is configured to reset on each document or page. Find the counter properties and disable "reset per job." In GoLabel, this is in the Object Properties > Counter > uncheck "Reset on new label format."
Barcode prints but will not scan Print density is too high (ink spread) or too low (faded bars). Adjust darkness in the driver in single-point increments. On 300 DPI printers, the target quiet zone on either side of a Code 128 barcode is 10x the narrowest bar width — check that your label canvas does not clip the quiet zone.
Labels feed but numbers skip The counter increment is set to 2 or higher. Open the counter field properties and confirm increment = 1.
Print is offset 5 mm on every label Calibration was not run after loading new stock, or the label top-of-form offset setting is non-zero. Run a gap calibration feed and reset the vertical offset to 0 in the printer settings.
Ribbon wrinkles on metalized silver stock The ribbon is wax-only, not resin. Metalized silver polyester requires a resin or resin-wax hybrid ribbon. Swap the ribbon before continuing.
Labels peel at corners after application The surface was not cleaned before application. Metal and powder-coated surfaces need an isopropyl alcohol wipe and 60 seconds of dry time before pressing the label down. Press from center to edges with firm thumb pressure for 10 seconds.
Tools and resources
- Printer: GoDEX RT230i — 300 DPI thermal transfer handles metalized and white polyester stock at 300 DPI
- Label stock — metalized silver barcode: Asset tags for equipment — metalized silver barcode label
- Label stock — semi-gloss white barcode: Asset tags — semi-gloss white barcode
- Ribbon: Thermal transfer ribbon — resin-compatible for polyester stock
- Software setup guide: How to set up a GoDEX printer with GoLabel software
FAQ
What software do I need to print sequential numbered asset tags? Any label design tool with a counter or serialization object works: GoLabel (free with GoDEX printers), Bartender, NiceLabel, or ZPL command strings. The key feature is a counter field that auto-increments per label without manual input.
Can I print sequential asset tags from Excel? Yes. Most label software accepts a CSV or Excel data source. Map the number column to a barcode object and a text object. The software prints one label per row. For runs under 1,000 labels, a counter field is faster than a spreadsheet merge; for large imports from an existing asset database, the CSV route is more accurate.
What DPI do I need for asset tag barcodes? Code 128 and Code 39 barcodes on a 2" × 1" asset tag scan reliably at 203 DPI. If the tag includes a QR code or a font smaller than 8 pt, use 300 DPI. In 2026, 300 DPI printers cost roughly the same as 203 DPI models at most price points, so there is little reason to choose the lower resolution for new purchases.
Is metalized silver or semi-gloss white better for asset tags? Metalized silver polyester holds up to solvents, heat up to 150°F, and outdoor UV exposure for 3–5 years. Semi-gloss white is easier to read at a glance and costs less per label. Use metalized silver for warehouse equipment, vehicles, and outdoor assets; semi-gloss white for office computers, monitors, and furniture.
How do I continue a number series after I run out of labels mid-batch? Check the last number printed on the roll. In your software, set the counter start value to that number plus 1, load the new roll, and run a single test label to confirm the sequence before printing the remainder.
What barcode format should asset tags use? Code 128 is the standard for most IT and facilities asset tracking in 2026 — it encodes alphanumeric strings efficiently and scans on every handheld and phone scanner. Code 39 is an acceptable alternative for legacy scanners. QR codes add a URL link to an asset record but require a 300 DPI printer to stay scannable at small sizes.
Can I add a logo to sequential asset tags? Yes. In your label template, place your logo as a fixed graphic object and place the counter field as a separate variable object. The logo prints identically on every label while only the number changes.
How many labels can I print per hour on a desktop thermal printer? A GoDEX printer at 4 inches per second prints a 1" tall label every 0.25 seconds — roughly 1,400 labels per hour at continuous speed, accounting for inter-label gaps. Actual throughput in batch mode is typically 800–1,000 per hour including pauses between rolls.
One last thing
The single most common reason a sequential print run fails in the field in 2026 is not a software configuration error — it is label stock that was not matched to the ribbon type. Wax ribbon on metalized silver polyester looks fine coming off the printer and fails within 48 hours of handling. Match your stock and ribbon before you print 500 labels.