
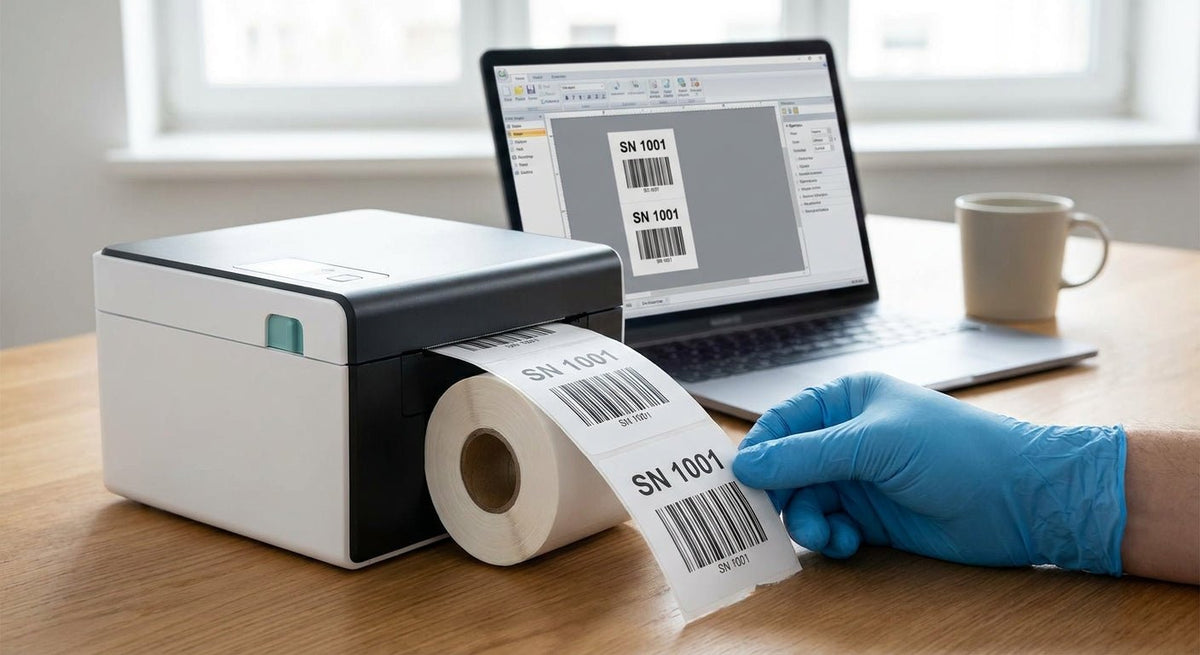
Printing serial number labels with a thermal printer takes about 20 minutes to set up the first time — once your template and label stock are dialed in, each batch prints in seconds. This guide covers every step: hardware selection, software configuration, label stock, template design, and the specific print settings that keep barcodes scannable and serial numbers legible at small point sizes.
TL;DR: To print serial number labels with a thermal printer in 2026, you need a thermal transfer printer (not direct thermal), a ribbon, polyester or polypropylene label stock, and label design software that supports sequential number generation. A 300 DPI printer handles most warehouse and IT asset use cases; step up to 600 DPI when serial numbers include dense barcodes or small human-readable text. The GoDEX RT863i at 600 DPI is the right choice for high-density serial number labels that need to stay readable for years.
Why This Matters
Serial number labels are not shipping labels. They live on assets for 5–10 years, get handled, exposed to heat, solvents, and abrasion, and must scan reliably every time. A label printed on direct thermal stock with the wrong settings fades in 12–18 months. Getting the printer type, material, and software configuration right the first time eliminates retagging costs and audit failures.
What You'll Need
- Thermal transfer printer — 300 DPI minimum; 600 DPI for small labels or dense barcodes
- Resin or wax-resin ribbon — matched to your label stock
- Label stock — polyester (silver metalized or white) or polypropylene for durable applications; paper only for short-lived indoor use
- Label design software — GoLabel (free with GoDEX printers), Bartender, ZebraDesigner, or NiceLabel
- Data source — a CSV, Excel file, or database with your serial number sequence
- USB or Ethernet cable, or Wi-Fi if your printer supports it
- Calipers or a ruler — to measure your label stock dimensions precisely
- Test labels — at least 10 labels to run verification prints before committing to a full batch
Step 1: Choose the Right Printer for Serial Number Labels
Action: Confirm your printer is thermal transfer, not direct thermal.
Direct thermal printers use heat-sensitive paper that darkens on contact — no ribbon needed, fast for shipping labels, but the image fades when exposed to UV light, heat above 150°F, or common chemicals. Serial number labels printed direct thermal on asset tags will be unreadable within 1–2 years in most environments.
Thermal transfer printers melt ribbon ink onto the label substrate, producing an image that is bonded to the material. With a resin ribbon and polyester stock, the printed serial number survives temperatures from -40°F to 300°F, chemical washdowns, and outdoor UV exposure for 5+ years.
Resolution matters for serial numbers. A 10-digit serial number printed at 6-point font on a 1" × 0.5" label at 203 DPI looks pixelated and can fail OCR. At 300 DPI the same label is clean. At 600 DPI — the resolution of the GoDEX RT863i — you can fit a full barcode plus a human-readable serial number on a label under 1 inch wide and have both scan and read cleanly.
Common mistake: Using a direct thermal printer because it's already on your desk. If your printer has no ribbon spindle, it is direct thermal. Check before designing your template.
Expected outcome: You have a thermal transfer printer with a ribbon loaded and label stock installed. If you're buying new in 2026, the 600 DPI option costs more upfront but eliminates reprints on small-format labels.
Step 2: Select and Load the Right Label Stock
Action: Match your label material to the end-use environment before designing anything.
Label stock choice determines adhesion, durability, and whether your ribbon ink bonds correctly. The three materials that work for serial number labels:
- Silver metalized polyester — the standard for IT asset tags and equipment. Scratch-resistant, tamper-evident options available, bonds well with resin ribbon. Survives outdoor exposure.
- White polypropylene — slightly softer surface, good for curved surfaces, resists moisture and most solvents. Works with wax-resin or resin ribbon.
- White semi-gloss paper — use only for indoor, climate-controlled environments where labels will not be handled heavily. Lower cost, but life expectancy under 3 years even indoors.
Load the stock into your printer with the label face up, printable side down against the print head. Feed it through the media guides and adjust the guides so they touch the edge of the stock without binding. Run a self-test print (usually triggered by holding the Feed button at power-on) to confirm media is loaded and tracking straight.
Ribbon type must match stock: Wax ribbon on polyester will smear. Use wax-resin for polypropylene and paper; use full resin for polyester and labels that must resist chemicals or high temperatures.
Common mistake: Loading the label stock with the liner side against the print head. The liner is usually slightly glossy on one side. If your test print shows no image, flip the roll.
Expected outcome: A clean self-test label with sharp, consistent print across the full width of the stock.
Step 3: Install and Configure Label Design Software
Action: Install GoLabel or your preferred label design software and create a new label document matched to your stock dimensions.
GoLabel is free, ships with GoDEX printers, and handles sequential numbering natively — which is exactly what serial number printing requires. If you are using a non-GoDEX printer, Bartender and NiceLabel both support serial number generation and database connectivity.
- Open the software and create a new label. Enter the exact dimensions of your label stock — width first, then height. Use calipers for this; a 2.00" × 1.00" label measured as 2.00" might actually be 1.97" × 0.98", and a mismatch causes print registration errors.
- Set the printer to the connected device and confirm the DPI matches the driver setting (e.g., 600 DPI for the RT863i).
- Set the label orientation — portrait or landscape — based on how your serial number and barcode will read when applied to the asset.
Common mistake: Leaving the DPI setting in the software at the default (often 203 DPI) while the printer is set to 300 or 600 DPI. The printed image will be undersized or oversized. Match software DPI to printer hardware DPI.
Expected outcome: A blank label template in the software that matches your physical stock dimensions exactly, with the correct printer and DPI selected.
Step 4: Design the Serial Number Template
Action: Add a barcode object and a text object to the label, then connect both to a sequential data source.
In GoLabel (and most label software), you place objects on the canvas:
- Barcode object — click Insert > Barcode. Choose your barcode symbology: Code 128 is the default for alphanumeric serial numbers. QR Code works if you need to encode a URL or more than ~20 characters. Set the barcode height to at least 0.25" so scanners can acquire it reliably. Enable the human-readable line below the barcode.
- Text object for the serial number — place it below or beside the barcode. Set the font size to at least 8pt for human readability. Smaller than 6pt at 300 DPI starts to degrade.
- Additional fields — add your company name, product line, date code, or logo as static objects. These do not change between labels.
For sequential numbering, select the barcode object, go to its data properties, and set the data type to "Counter" or "Sequence." Set the starting value (e.g., SN-00001), the increment (typically 1), and the total number of labels to print. The software generates each serial number automatically — you do not type them individually.
If your serial numbers come from an external list (a database or CSV), use the "Database" or "Excel" data source option instead of the counter. Map your serial number column to the barcode and text objects.
Common mistake: Setting the barcode quiet zone (the blank margin around the barcode) to zero. Scanners need at least 10 times the narrowest bar width as quiet zone on each side. Most software sets this automatically if you don't override it.
Expected outcome: A template where every element is positioned, sized, and connected to a data source. Preview at least 3 sequential values before printing.
Step 5: Configure Print Settings and Run a Test Batch
Action: Set darkness (print density), speed, and tear/cut mode, then print 10 test labels.
Print density controls how much heat the print head applies. Too low and the barcode has light streaks; too high and thin barcode bars bleed together, making them unscannable even though they look dark. Start at the midpoint of your printer's darkness range (often 10–15 on a 1–30 scale) and adjust.
- Speed: Serial number labels on polyester stock print best at 2–4 inches per second. Faster speeds reduce heat dwell time and can produce light prints. Shipping labels tolerate 6–8 IPS; asset tags should not.
- Media type: Set to "Label with gaps" if your stock has standard inter-label gaps. Set to "Continuous" only if you are cutting to length.
- Calibration: Before the test batch, run a media calibration so the printer detects the gap between labels. On most GoDEX models: hold Feed + Power for 3 seconds, then release. The printer will feed 3–5 labels and lock in the gap position.
Print 10 sequential test labels. Scan each barcode with a handheld scanner. All 10 must scan on the first pass. If any fail, increase darkness by 2 points and retest. Also verify the human-readable serial number matches what the scanner decoded.
Common mistake: Skipping the scan verification and assuming the labels are correct because they look good. A barcode that looks printed but has a bar-width error will fail every scanner in the field.
Expected outcome: 10 labels that all scan correctly, with legible human-readable text and no smearing or voids.
Step 6: Print the Full Batch and Apply Labels
Action: Send the full print job, inspect the output, and apply labels before the adhesive cold-flows.
Once your test labels pass scan verification, print the full batch. Monitor the first 20 labels as they come off the printer — watch for registration drift (labels printing off-center) and ribbon wrinkle (a sign the ribbon tension needs adjustment).
After printing, apply labels within 48 hours if using aggressive adhesive stock. Store unused labels in a sealed bag away from UV light. Polyester stock with resin-ribbon print is stable for years in storage, but adhesive performance degrades faster than print quality.
Common mistake: Touching the label face before applying. Skin oils reduce adhesion, especially on metal surfaces. Handle labels by the liner.
Expected outcome: A complete set of applied, scannable serial number labels, each with a unique number, confirmed readable by your inventory or asset tracking system.
Troubleshooting
Labels printing off-center or cut in the wrong place Run a media calibration. The printer has lost its gap reference. On GoDEX printers, this is a 3-second button hold at startup. Recalibrate every time you change label stock.
Barcodes scanning inconsistently Print darkness is too low or too high. Print a test at your current setting, then at +3 and -3. Scan all three. Use the darkest setting where bars are still distinct — not touching at their edges. Also check that the barcode quiet zones are intact and not overlapping the label edge.
Ribbon wrinkling or creasing Ribbon tension is mismatched to print speed. Slow the print speed by 1 IPS and check that the ribbon and label stock are the same width. A ribbon narrower than the stock leaves unprinted edges; a ribbon wider than the stock wrinkles at the edges.
Serial numbers printing out of sequence The data source counter reset. This happens if you reopened the template and the counter was set to reset at open. Lock your starting value in the counter settings and confirm the total count before sending the job.
Label adhesive not sticking to metal surface The surface temperature is below 50°F or the metal surface has oil or dust contamination. Clean the surface with isopropyl alcohol (70% minimum), let it dry, then apply the label with firm pressure for 10 seconds. For curved metal surfaces, use a polyester label stock with aggressive adhesive rated for metal.
Print head leaving white vertical streaks The print head has debris or a dead element. Clean the head with a 99% isopropyl alcohol swab and let it dry for 2 minutes. If streaks persist after cleaning, the print head element is damaged and needs replacement. Print heads on thermal transfer printers typically last 30–50 km of printing.
Tools and Resources
- Thermal transfer printer at 600 DPI: The GoDEX RT863i prints at 600 DPI with a 4-inch print width — the right hardware for serial number labels that include small text and dense barcodes.
- Metalized silver label stock: Asset tags for equipment in metalized silver polyester with barcode capability, matched to thermal transfer printing.
- GoLabel software setup: The GoLabel software guide covers template creation, counter setup, and database connectivity step by step.
- Thermal label printer setup from scratch: How to set up a thermal label printer for first use walks through driver installation and initial calibration.
- Resolution selection: If you are deciding between 300 DPI and 600 DPI for your application, 300 DPI vs 600 DPI: which resolution do you need gives a direct comparison by label size and content type.
What to Do Next
Once serial number labels are printing cleanly, the next step is connecting them to an asset tracking system. Scan-verified serial numbers are only useful if your database records them at the point of application. See how to create a barcode asset tracking system for the database and scanning workflow that turns printed labels into live asset records.
FAQ
What's the best thermal printer for serial number labels in 2026? A thermal transfer printer at 300 DPI or 600 DPI. For small-format labels with dense barcodes, 600 DPI is the right call — the GoDEX RT863i at 600 DPI handles labels as small as 0.5" wide without barcode degradation. Direct thermal printers are not suitable for serial number labels because the print fades over time.
Can I use a direct thermal printer for serial number labels? Not for durable applications. Direct thermal images fade when exposed to heat, UV light, or chemical contact — all common in warehouse, manufacturing, and IT asset environments. Use thermal transfer with a resin ribbon and polyester stock for labels that need to last more than 2 years.
What label stock should I use for serial number labels on metal equipment? Silver metalized polyester with aggressive adhesive. It bonds to powder-coated and bare metal, resists solvents and abrasion, and pairs with resin ribbon for print that lasts the life of the equipment. Avoid paper stock on any metal surface.
How do I auto-generate sequential serial numbers in GoLabel? Insert a barcode object, open its data properties, and set the data type to "Counter." Enter your start value, increment (usually 1), and total count. GoLabel generates each serial number automatically during the print job — no manual entry required.
What barcode symbology should I use for serial number labels? Code 128 is the standard for alphanumeric serial numbers up to about 20 characters. It is compact, widely supported by scanners, and handles uppercase letters, lowercase letters, and numbers. Use QR Code only if you need to encode a URL or more than 20 characters, or if you want mobile-phone scannability.
How small can a serial number label be and still scan reliably? At 600 DPI, a Code 128 barcode on a label as narrow as 0.75" wide will scan correctly if the barcode height is at least 0.25" and quiet zones are intact. At 300 DPI, keep the label at least 1" wide for reliable scanning. Below those sizes, bar widths become too narrow for most handheld scanners.
What print speed should I use for serial number labels? Set your printer to 2–4 inches per second for polyester stock. Higher speeds reduce heat dwell time and can produce light, inconsistent prints. Shipping label printers run at 6–8 IPS because paper stock transfers ink more readily — do not carry that setting over to asset label printing.
Is 300 DPI enough for serial number labels, or do I need 600 DPI? For labels 2" wide or larger with standard Code 128 barcodes, 300 DPI is sufficient. For labels under 1.5" wide, labels with small human-readable text (under 8pt), or labels with 2D barcodes like QR or Data Matrix, 600 DPI gives cleaner output and higher first-pass scan rates.
One Last Thing
The most common retagging cost in 2026 is not a bad printer — it's the right printer with the wrong ribbon. Wax ribbon on polyester stock looks fine on the day of printing. Six months later in a warehouse with forklift exhaust and temperature swings, the print smears and the barcode fails. Match your ribbon to your substrate: resin ribbon on polyester, wax-resin on polypropylene, wax on paper. That one spec decision determines whether your serial number labels last 18 months or 10 years.