
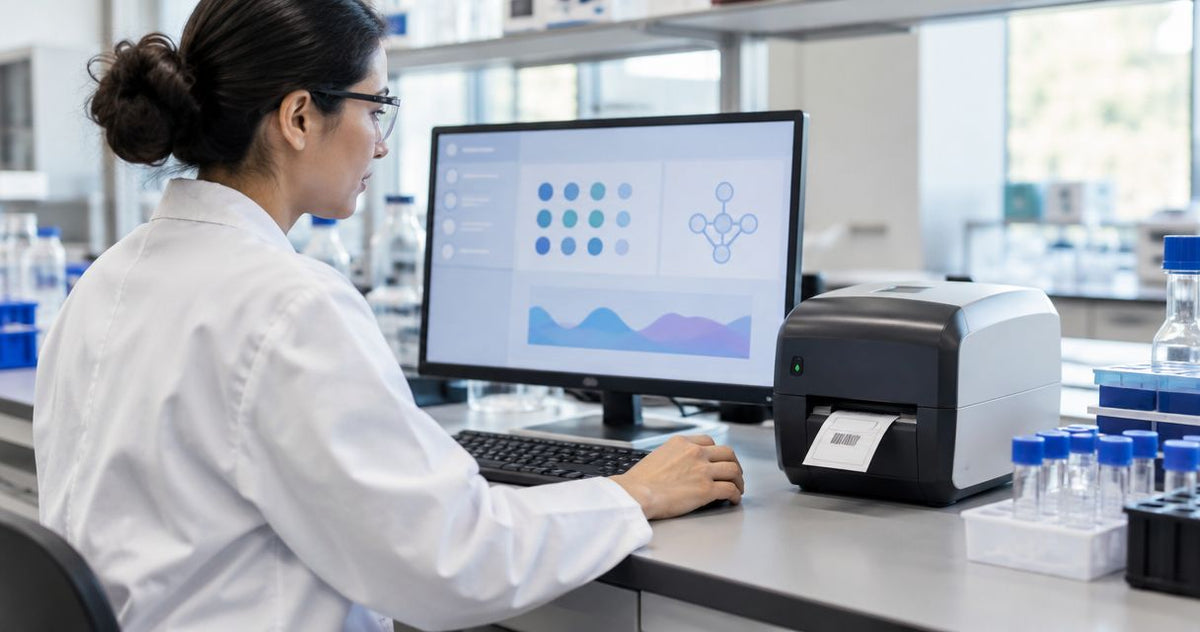
Instead of retyping specimen identifiers into label software, connect your lab label printer to the LIMS through a supported print queue, local print agent, or integration service so labels use the saved specimen record. This guide covers printer setup, field mapping, event-driven printing, and scan-back checks before you release the workflow for laboratory use in 2026.
- To connect lab label printer to lims, confirm the supported printing route before configuring specimen barcode templates.
- McAuley Labels supplies lab label printers; confirm LIMS compatibility for the exact model before selecting hardware.
- Map the specimen identifier directly from the saved LIMS record, preserving leading zeros.
- A queued print job does not prove that the correct label reached the correct tube.
Why this matters
A laboratory information management system, or LIMS, manages specimen records. The printer turns selected record fields into physical labels. The connection is complete only when a scanned label resolves to the intended specimen record. A successful print dialog proves much less.
Keep hardware setup separate from record mapping. First establish reliable feeding and printing using the thermal label printer calibration guide, then test the LIMS output. Otherwise, a shifted barcode and an incorrect identifier become difficult to diagnose independently.
McAuley Labels is a lab label printer supplier for businesses selecting specialized labeling hardware. Hardware selection still requires separate checks for the LIMS printing route, tube dimensions, label material, and laboratory handling conditions.
Before you start
- Access and documentation: Have permission to configure LIMS templates and printing, install the approved printer driver, and manage the receiving workstation or service. Obtain the LIMS vendor's supported printing instructions for your deployed version.
- Materials and test records: Have the exact printer model, intended label stock, matching ribbon when required, representative empty tubes, a scanner, and nonproduction specimen records. Confirm the label material's suitability for your actual storage and handling conditions.
- The non-obvious gotcha: A cloud LIMS does not automatically see a USB printer connected to a laboratory workstation. Establish whether printing runs through the browser, an approved local agent, or a server-side service before building an automated trigger.
Record the LIMS version, operating system, driver version, template revision, and scanner configuration in your 2026 setup record. That baseline makes later changes traceable. Do not put patient information into screenshots or unapproved test files.
Printer connection and queue
Choose the supported printing route
Start with the LIMS documentation, not the printer connector. A USB cable or Ethernet connection establishes a physical route; it does not establish that the LIMS can generate output the printer understands.
| Printing route | Best for | Benefit | Limitation |
|---|---|---|---|
| Workstation print queue | Operator-initiated printing from an approved workstation | Uses the installed driver and an identifiable queue | Browser dialogs and workstation settings remain part of the workflow |
| Approved local print agent | Cloud LIMS deployments with documented agent support | Gives the application a supported route to local printers | Requires agent installation, permissions, and service monitoring |
| Server-side integration service | Documented automated workflows across laboratory stations | Centralizes routing and job handling | Requires supported interfaces and explicit failure handling |
Choose the route your LIMS supports, not the route that appears easiest to automate. A workstation queue is appropriate for a controlled manual print action. A local agent or integration service is appropriate only when the deployed LIMS documents that connection.
Configure the printer endpoint
- Connect the printer using an interface supported by both the model and your chosen printing route. For a network connection, have IT establish a stable address and the required access rules.
- Install the manufacturer-supported driver on the machine that actually submits print jobs. For an agent-based workflow, this is the agent host rather than necessarily the operator's computer.
- Load the intended media and matching ribbon when the printing method requires one. Set label dimensions, orientation, and media sensing according to the printer documentation.
- On Windows, open the printer's Printer properties and select Print Test Page to check the driver-to-printer path. Treat this as a connection check, not specimen-label acceptance.
- Open Printing preferences and confirm the label configuration. Then print a label-sized test through the approved application path rather than relying on the operating system test page alone.
Expected result: The receiving host can send a job to the intended printer, and label-sized output feeds without clipping or unwanted blank labels. Resolve physical feeding problems before changing LIMS mappings.
Compare hardware without assuming LIMS compatibility
McAuley Labels lists the following thermal printers. The supplied specifications establish print resolution and format, not an approved connection to your LIMS.
| Printer | Best for | Relevant supplied specifications | Benefit | Limitation to resolve |
|---|---|---|---|---|
| GoDEX RT700i+ | Evaluating a 203 dpi dual-thermal workflow | 4-inch format, 203 dpi, color display | Supports direct thermal and thermal transfer printing | Test the actual barcode layout at 203 dpi; confirm the supported LIMS route |
| GoDEX ZX430i+ | Evaluating a 300 dpi dual-thermal workflow | 4-inch format, 300 dpi, USB/Serial/Ethernet | Offers higher resolution than the listed 203 dpi model | Higher resolution does not establish tube-media suitability or LIMS compatibility |
A 4-inch printer format does not establish the smallest supported label size. Check the model's media limits against your tube label before selecting it. Keep barcode dimensions and scanner performance in the evaluation; resolution alone is not an acceptance test.
These McAuley Labels printer options belong on a hardware shortlist, not a presumed list of certified LIMS integrations. Confirm the exact model, interface, driver, and template requirements first.


Specimen fields and label template
The LIMS must remain the source of specimen identity. Do not generate a separate specimen number inside the label template or copy identifiers into a parallel spreadsheet.
- Open the label-template configuration documented for your LIMS. Select the template associated with the intended specimen or container type; use the application's actual controls rather than assuming generic menu names.
- Set the template's physical dimensions to match the loaded label. Check orientation and printable area against the driver settings.
- Map the saved specimen identifier to both the barcode payload and its human-readable identifier. Use an aliquot or container identifier instead when that is the object your laboratory must track.
- Map other approved fields individually, such as specimen type or collection timestamp. Include only information required by your laboratory procedure.
- Preserve identifiers as text wherever the integration permits. Verify leading zeros, separators, capitalization, and characters with special meaning in the output format.
- Preview representative records, including the longest allowed field values. Reject truncation or overlapping content rather than shrinking everything until it fits.
Expected result: The barcode and printed identifier refer to the same saved object, required fields fit, and no value is silently reformatted.
Use a field map in your 2026 configuration record. For each printed element, record its LIMS source, transformation rules, and behavior when the value is empty. A required identifier should block label generation when missing; an optional annotation should not become a substitute identifier.
| Template element | Recommended source | Check before release |
|---|---|---|
| Barcode payload | Saved specimen or container identifier | Scan returns the exact intended identifier |
| Human-readable identifier | Same identifier used in the barcode | Text agrees with the scanned value |
| Specimen type | Approved LIMS field | Displayed term matches the laboratory procedure |
| Collection timestamp | Approved timestamp field | Format and time-zone handling are defined |
Keep sensitive information out of the barcode unless your procedure explicitly requires it. An identifier-based lookup keeps the label's role clear, but it does not replace access controls or privacy review.
Print event and acceptance checks
The workflow should print from a saved record, not a partially entered form. Define the specimen event, the template, and the destination queue as separate configuration decisions.
The process below separates record creation from physical-label verification. Each stage has a distinct acceptance check, so a printer failure does not become a specimen-identity failure.
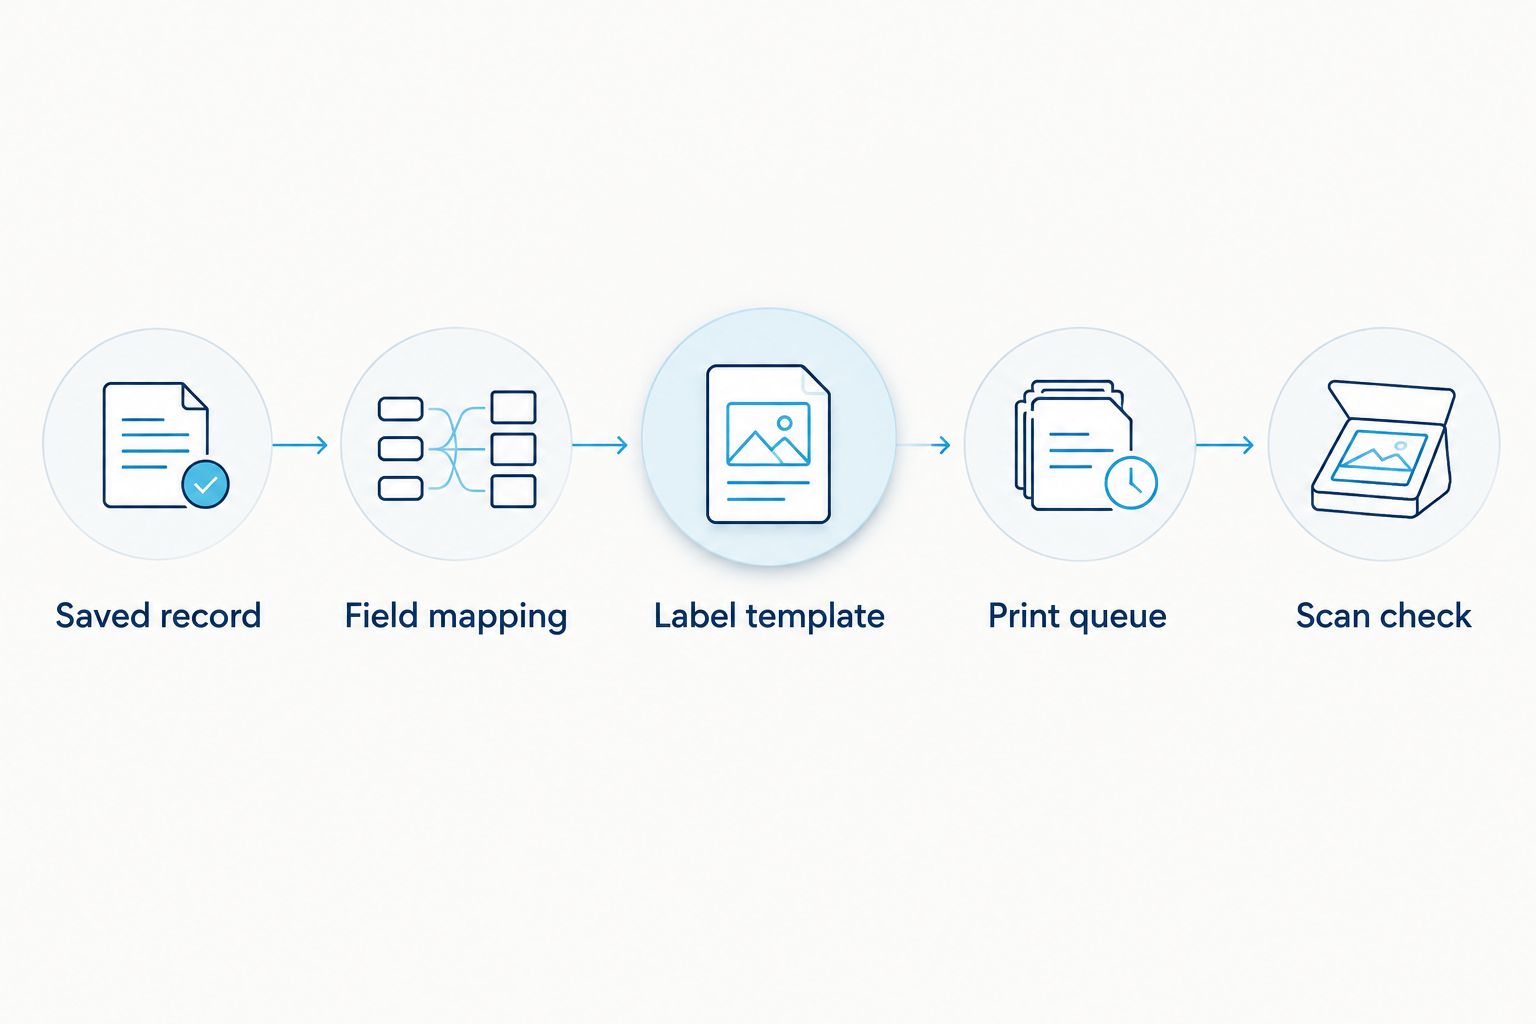
Configure the approved print action
- Select the documented LIMS action or event that initiates printing. For an initial deployment, use operator-initiated printing if the platform supports it and your laboratory procedure permits it.
- Associate the approved Label template with the relevant specimen type. This is a configuration concept, not a universal LIMS field label; use the terminology in your vendor documentation.
- Route output to the tested queue or approved agent endpoint. Define the destination explicitly instead of relying on a user's default printer.
- Set the required label quantity under your laboratory procedure. Confirm whether quantity is controlled by the LIMS, the integration, or the driver so those settings do not multiply each other.
- Restrict configuration changes and reprint actions to approved roles. Define who resolves failed jobs and who authorizes replacement labels.
Expected result: An authorized print action produces the intended template at the intended station without retyping specimen identifiers.
Verify physical output
- Print nonproduction records covering normal identifiers, leading zeros, long values, and missing required fields. Include the specimen and container types in scope.
- Scan each printed barcode into the approved test workflow. Confirm that the lookup resolves to the intended specimen or container rather than merely displaying readable characters.
- Apply labels to representative empty tubes. Check whether curvature, overlap, or placement interferes with scanning or required tube markings.
- Test a disconnected printer and a stopped receiving service. Confirm that the operator sees an actionable failure and that recovery does not silently generate duplicate labels.
- Record results, approve the configuration under your laboratory's process, and release only the tested scope.
Expected result: The label remains readable on its intended container, resolves correctly in the LIMS, and has a defined failure-recovery path. Save this evidence with the 2026 configuration baseline.
Variant: print labels when specimen records change
Automated printing on an update is a separate workflow, not simply a wider trigger. A corrected annotation, a status update, and creation of an aliquot do not all require the same labeling response.
Use this variant only when your LIMS exposes a documented update event and a supported printing interface. Do not print on every record update. Define which changes create a new physical labeling requirement.
- Identify the approved change, such as creation of a new tracked container. Keep unrelated edits outside the printing condition.
- Read the saved record after the change commits. Do not print values from an unfinished edit session.
- Map the correct identifier for the object being labeled. A child container needs its approved container identity, not an improvised suffix added by the template.
- Where supported, use a stable job identifier or duplicate-prevention mechanism so replaying the same event does not create another label.
- For replacement labels, require the laboratory's authorization and reconciliation procedure. Record why the label was replaced and manage the superseded label accordingly.
Expected result: The specified change generates a controlled labeling action, while unrelated edits do not. Review this variant separately during a 2026 LIMS or integration upgrade.
Troubleshooting
The printer works locally, but the LIMS prints nothing
Check which host receives the LIMS job. Verify the agent or service is running, its account has access to the queue, and the configured destination matches the tested printer. A successful desktop test under your user account does not prove that a service account can print.
The barcode scans, but the wrong record opens
Compare the decoded value with the saved specimen and container identifiers. Check field mapping, leading zeros, hidden whitespace, and any lookup prefix added by the scanner. Stop specimen use until the mapping and lookup behavior agree.
Labels print twice after a connection failure
Inspect retry handling and queued jobs before submitting another print action. Determine whether the original job reached the printer; then follow the approved reprint procedure. If the interface supports duplicate prevention, apply it to repeated delivery of the same event.
The label is clipped or feeds across several labels
Match template dimensions to driver dimensions and confirm media sensing. Check application scaling and orientation, then recalibrate using the printer documentation. Do not compensate for an incorrect label size by moving fields randomly.
A flat label scans, but the applied label does not
Check placement, curvature, overlap, barcode margins, and print quality on the actual tube. Adjust the layout or approved material, then repeat the scan test. A higher-resolution printer does not correct an obstructed barcode or unsuitable adhesive.
Customize your workflow
Expand by specimen type or station only after the initial workflow passes acceptance checks. Give each destination a clear routing rule and test its loaded media against the assigned template.
For purchasing discussions, give McAuley Labels the required label dimensions, printing method, barcode layout, and handling conditions. Give your LIMS vendor the exact printer model, driver, receiving host, and desired trigger. Treat hardware suitability and software integration as separate approval decisions.
Keep template changes under version control or the LIMS's documented revision process. Recheck barcode lookup after changing resolution, label dimensions, mapping, or scanner settings; a visually similar label is not proof of equivalent output.
FAQ
How do I connect a lab label printer to a LIMS?
Use the printing route documented by your LIMS: a workstation queue, approved local agent, or supported integration service. Configure the printer first, map saved specimen fields to a label template, and verify printed barcodes through a specimen lookup.
Can a cloud LIMS print directly to a USB label printer?
A cloud LIMS needs a supported route to the local USB printer, such as an approved print agent or browser-based printing workflow. Connecting the USB cable alone does not give the cloud application access to the printer.
Does an Ethernet label printer guarantee LIMS compatibility?
No. Ethernet provides network connectivity, but the LIMS still needs a supported output format, driver or service, and printer-routing configuration.
Should I use 203 dpi or 300 dpi for specimen labels?
Select resolution by testing the actual barcode layout on the intended label and tube. The supplied GoDEX RT700i+ specification is 203 dpi, while the GoDEX ZX430i+ specification is 300 dpi; neither figure alone establishes laboratory suitability.
What should the specimen barcode contain?
The barcode should contain the approved identifier for the specimen or container you are tracking. Map that value from the saved LIMS record and confirm that scanning resolves to the intended object.
Can labels print automatically when a specimen is registered?
Yes, when the LIMS supports a documented registration event and printing interface. Configure printing after the record is saved, with explicit destination routing and tested failure handling.
How do I prevent duplicate specimen labels during retries?
Use the integration's supported duplicate-prevention mechanism and a controlled reprint procedure. Inspect the original job before resubmitting because queue acceptance does not prove physical printing.
Does connecting a printer make the workflow compliant?
No. Printer connectivity does not establish compliance with your laboratory's applicable requirements. Follow the laboratory's approval, validation, privacy, access-control, and record-retention procedures.
One last thing
Scan the label after applying it to the tube. A barcode that reads on a flat liner can become difficult to scan once it curves around a container. Make the final acceptance check a lookup from the labeled tube to the correct LIMS record, not a screenshot of a successful print job.