
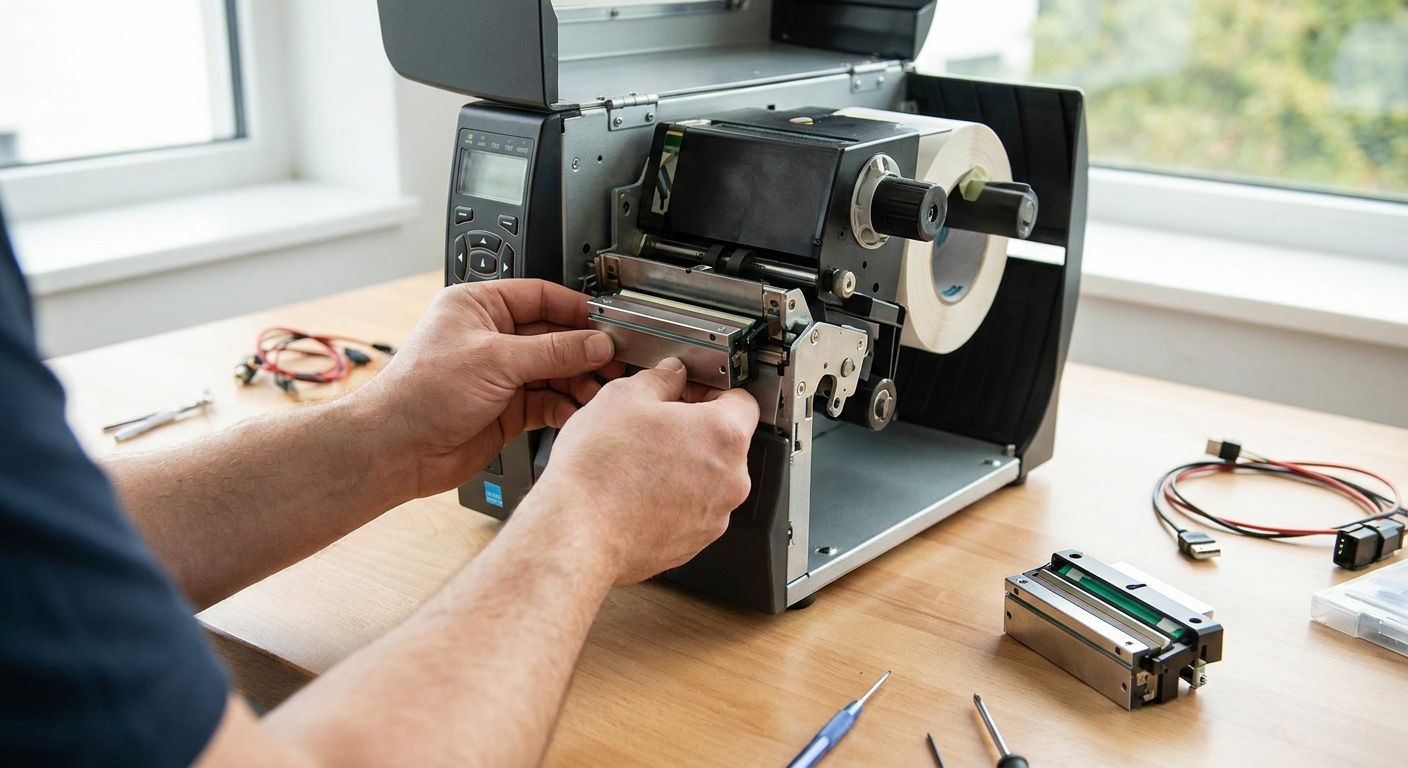
A dying thermal printhead shows up as faint print, white streaking, or a diagonal blank line that never goes away no matter how many times you clean the printer. This guide walks through how to replace a thermal printhead on a desktop or industrial label printer, step by step, in 2026 terms — connectors, screws, and calibration included.
- Replacing a thermal printhead takes 15-20 minutes on most GoDEX desktop models — no technician needed.
- A worn printhead shows a fixed blank line in every print, not random streaks that cleaning removes.
- GoDEX printers carry a 3-year warranty, so check warranty status before buying a replacement head in 2026.
- Always match printhead DPI to your printer model — 203, 300, and 600 DPI heads are not interchangeable.
Why this matters
A printhead is a consumable, not a permanent part. Every print pass drags labels or ribbon across a row of heating elements, and those elements wear down with volume — abrasive label stock, dirty ribbon, and running the printer too hot all shorten the life of the head. Ignoring a worn printhead doesn't just cost you print quality; it costs you barcodes that won't scan and asset tags that fail a compliance audit.
Replacing the printhead yourself instead of shipping the printer out saves days of downtime. Most GoDEX thermal printers, including the GoDEX RT730i, use a tool-less or two-screw printhead mount specifically so the part can be swapped on the shop floor. If your printer is under warranty, check with McAuley Labels before opening the case — a self-install on a covered unit is usually fine, but confirm first.
What you'll need
- A replacement printhead matched to your exact printer model and DPI rating (203, 300, or 600 DPI — they are not interchangeable)
- A Phillips or Torx screwdriver, depending on model
- Isopropyl alcohol (90%+) and lint-free cleaning swabs
- Nitrile gloves — skin oils on the ceramic element cause premature failure
- A properly loaded thermal transfer ribbon or direct thermal media for the test print
- 15-20 minutes with the printer powered off and unplugged
The steps
1. Confirm it's actually the printhead
Before ordering a part, rule out the cheaper fixes. A blank line that stays in the exact same spot on every label, regardless of what you print, points to a dead heating element — that's a printhead. Streaking that shifts or disappears after cleaning is a dirty head, not a dead one.
Common mistake: people replace a printhead when the real problem is a worn platen roller or a ribbon tension issue. If the print looks smeared rather than missing entirely, check the platen roller first.
2. Power down and open the printer
Unplug the printer completely — never work on a printhead while it's powered, since the elements run hot enough to burn skin during a print cycle. Open the top cover and locate the printhead assembly, usually hinged just above the platen roller.
This step matters because static discharge and live voltage are the two most common causes of a fresh printhead dying in its first week. Ground yourself before touching any connector.
3. Release the old printhead
Most desktop models, including the GoDEX line, use a spring-loaded bracket held by one or two screws. Remove the screws, then gently unclip the printhead from its mounting bracket. Disconnect the ribbon cable connector by pulling straight back — never twist it, since the pins bend easily.
Expected outcome: the printhead assembly comes free in one piece, cable still attached until you unplug it. If it resists, you're forcing a screw that isn't fully out, not a stuck part.
4. Install the new printhead
Handle the new printhead by its plastic edges only — the ceramic strip along the bottom is the heating element, and fingerprints leave oils that cause uneven heat transfer and shorten its life immediately. Reconnect the ribbon cable first, then seat the printhead into the mounting bracket and replace the screws.
Don't overtighten. Stripped mounting screws are a common mistake here, and a printhead that isn't seated flush prints unevenly across the label width even when the part itself is brand new.
5. Reload media and ribbon
Close the printhead assembly and reload your label stock and ribbon, making sure the ribbon path runs correctly across the new head. A misthreaded ribbon is the single most common reason a freshly installed printhead prints garbage on the first pass — it's rarely the part.
Run the printer's self-test label if it has one. This confirms mechanical alignment before you touch software settings.
6. Recalibrate the printer
A new printhead needs a fresh calibration pass — sensor gaps, darkness settings, and print speed all shift slightly with a new head. Run the calibration routine through GoLabel or your printer's front-panel menu before printing production labels.
Skipping calibration is why some people think their "repair" made print quality worse. It didn't — the printer just needs to relearn label length and darkness with the new part. See the full walkthrough in how to calibrate a thermal label printer if the built-in routine isn't cutting it.
7. Test print and inspect
Print a batch of 10-20 labels at your normal darkness and speed settings, then inspect them under good light for streaking, faint spots, or uneven density across the width. Barcode labels should scan cleanly on the first pass — if a barcode scanner rejects more than one in ten, something's still off.
Expected outcome: uniform, dark print edge-to-edge with no repeating white lines. If you see a thin blank line in the same spot as before, the new printhead was seated incorrectly or the replacement part itself is defective.
Troubleshooting
- Same blank line after replacement — the printhead isn't seated flush, or the cable connector is loose. Reopen the assembly and reseat both.
- Print is faint everywhere, not just one line — this is a darkness/heat setting issue, not the printhead. Increase darkness in small increments through GoLabel.
- Barcodes scan inconsistently — check ribbon tension and confirm you're using the correct ribbon type (wax, wax/resin, or resin) for your label stock.
- New printhead died within days — almost always static discharge or skin oil contamination during install. Reinstall with gloves and a grounded wrist strap.
- Labels feed but nothing prints — this usually isn't the printhead at all; check how to fix a label printer that won't feed labels first.
- Print looks smeared rather than missing lines — that's a platen roller or ribbon tension problem, not a printhead problem, even after a fresh install.


Tools and resources
- A grounded wrist strap or antistatic mat, especially in dry winter shop conditions
- The correct wax, wax/resin, or resin thermal transfer ribbon for your label stock
- Your printer's calibration menu — most McAuley Labels GoDEX printers run this through the front panel or GoLabel software
- A reference copy of the GoDEX label printer troubleshooting guide for issues that turn out not to be the printhead at all
What to do next
Once the new printhead is calibrated and printing clean, get in the habit of cleaning it monthly with isopropyl alcohol — that single step is the biggest factor in how long a $50-$300 printhead lasts before you're back here again. Read how to clean a thermal printhead for sharper prints for the full maintenance schedule.
FAQ
How do you know if a thermal printhead needs replacing?
A fixed blank line or streak that appears in the same spot on every label, even after cleaning, means the printhead is worn. Print that's faint everywhere but not missing lines is usually a darkness setting, not the head.
How much does it cost to replace a thermal printhead?
Replacement printheads for desktop thermal printers typically run $50-$300 depending on DPI and print width in 2026, with wider 600 DPI heads at the higher end of that range.
Can you replace a thermal printhead yourself?
Yes. Most GoDEX and similar desktop printers use a screw-mounted printhead assembly designed for tool-free or two-screw removal, and the swap takes about 15-20 minutes.
Does a new printhead need calibration?
Yes, every time. A fresh printhead shifts darkness and label-length sensing slightly, so run the printer's calibration routine before production printing.
What causes a thermal printhead to wear out early?
Abrasive label stock, running darkness settings too high, dirty ribbon, and skin oil contamination during handling all shorten printhead life significantly faster than normal use.
Is direct thermal or thermal transfer harder on a printhead?
Direct thermal printing runs the head directly against the label surface, which wears elements faster than thermal transfer printing, where a ribbon buffers most of the contact.
How long does a thermal printhead last?
Printhead life is usually measured in inches or meters of media printed rather than time, but a shop running moderate daily volume typically replaces one every 1-2 years.
Do all thermal printheads fit any printer?
No. Printheads are model-specific and tied to a DPI rating — a 203 DPI head will not fit a printer built for 300 or 600 DPI, and mounting brackets differ across brands.
One last thing
The part that actually kills most printheads early isn't heat — it's fingerprints. Skin oil on the ceramic strip during install creates hot spots that fail within days, which is why every reputable replacement guide says the same thing: handle the new head by the plastic only, gloves on, every time.